Tuesday, 25 August 2015

Tuberose (Rajni Gandha) Plantation and Care


Tuberose knew as Rajni gandha. It produces waxy,  white and fragrant flowers on long spikes, which are mostly used as cut flowers; for making garlands and extracting essential oil.
Tuberose cultivation is getting popular in North India where it blooms during July-Oct.  This period is devoid of cut flowers.

1. Climate

Tuberose grows well in sunny situations. In India, commercial tuberose cultivation is just confined to warm, humid areas with average temperature range from 20-350C.

2. Soil and its Preparation

Loam and sandy loam soil having pH range from 6.5-7.5 with good aeration and well-drained soils are considered suitable for its cultivation.
The field should be well prepared by giving 2-3 ploughings and incorporating 25-30 tones/ha of well rotten FYM before planting time.

3.Care the bulbs

Water thoroughly after planting the bulbs when caring for your growing tuberoses, and then at regular intervals if natural rainfall doesn’t occur weekly. Also, they need plenty of 8-8-8 fertilizer during the growing season to do well. 


Tuberose flowers will bloom in mid to late summer. Tuberose plants make lovely scented, cut flowers for use in bouquets and vases. Cutting the flowers will not damage your plants.But use a sharp pair of shears during their cutting. 

After the bloom is gone from your tuberose plants, leave the foliage intact until it dies back naturally and continues watering as usual. The foliage provides nutrition for the bulbs and if cut back, your bulb will not flower next year. 

Once the leaves of your tuberose plant have turned yellow, it is safe to cut them back. After the first light frost of the season, carefully dig up your tuberose bulbs to remove them. Let them air dry for about a week before packing them away in a cool, dry place for winter storage. A paper bag filled with peat moss makes an appropriate bed for overwintering your bulbs.

Monday, 24 August 2015

Controll Lawn Grubs – Ways Get Rid Of Grub Worms


Poll live larvae in the ground, and leave the foot of the garden of good at eating grass brown and unattractive. Not only can these pests damage the grass, but their presence also reminds unwelcome animals that graze on grass that has emerged - digging up patches of grass in search of them. Major Japanese beetles lay their eggs in the grass in the summer, in the middle of the sunny Madenwürmeraus I came not to areas. Is to take care of this problem is not simply, as in the case, when these are worms and dug a place for grub with the incorporated applications.

Detecting Grub Worms:-

Grubworm key to acknowledge this. Visible lawn grub damage from late summer to early fall. Brown patches easy to look for the peel should be shaved are irregular on the ground, such as a garment. Or to determine the extent of infestation areas, small sections dig lawn. In general, more than five hundred by the square of the Church warrants it ¼ grub worms, treatment and fine-twined grub.

When to Apply Grub Worm Treatment:-

Once the larvae were detected in the plant and what treatment is required for you to know when to apply a grub worm treatment. The best time in late summer or early fall Madenwürmernist treatment, while they are still small and close to the surface of the pinworms.
The greater can not sure that the treatment has less susceptible to worm worms go and feed them. Therefore, insecticides less effective. For this latter applications can easily be washed off For while choosing a lawn grubs with insecticides is important to look at various things. The treatment is the most rapidly acting and autumn Dylox available. Merit and the beginning of the time , however, worth considering the use of a double Mach 2 , can be helpful for prevention. But the infection of pestilences, and it occurs in these animals do not comply with these things before you kill each other. When you read it carefully prescribed demands.
Natural Grub Treatment:-
Choosing a treatment is, for the natural, in order to remove the grass full of worms, a number of options available. All are safe and effective. These include milky spore, Neem oil, and nematodes - in most garden centres.Milky spore worms lawn is environmentally friendly and disease can be treated effectively. Spores are applied to the affected shirts, satin infects, as it emerged that they are feeding. The larvae feed on decaying additional spores in the soil and die once, and prevent further infestation helps release.

Neem oil is a botanical pesticide containing insecticidal properties. Neem oil works more for that, contrary to the defence of the Italian, so that has emerged beetles and lawn - the inhibition of the egg in the laying, growth and feeding. Neem oil is mixed with water (as prescribed), and the apes are sprayed onto the affected fields.

Beneficial nematodes are used as a natural grub treatment. So small, the free bacteria in the soil-dwelling worms alone, cut off your hair, so that it has emerged from kills and slays. Nematodes are sprayed to the movement of the liquids are mixed in the water is no less elite.
Once you know how to recognize and get rid of worms, the pin-worms worm will be better equipped to deal.


Sunday, 16 August 2015

Deficiency of Calcium Fertilizer


Deficiency of Calcium


Foliar feeding with calcium (application calcium rich fertilizer plants of leaves) can make the difference between a bumper crop blossom- end of fruit rot of tomatoes , or beautiful strives Granny Smith apples were bitter . We learn to make use of calcium foliar spray plants .
Homemade Calcium Rich Foliar Spray
Lends need calcium calcium foliar spray plants , avoiding leaf necrosis , short brown roots , fungal problems , weak stems and stunted growth ( argument touches ) . Calcium the spray of the soles of the cells do not progress , an important component of most of the fast growers, such as tomatoes , sweet potatoes and corn .

But it is true that they have to be brought back to the land of the calcium acid soils more alkaline, the pH of image is not a true necessity confirmed by foliar feeding with a lime in it, but a general guide of the person he loves .

While the price of commercial calcium foliar sprays , can be less expensive and just as easy to go into the mansion football rich foliar spray with or already in your garden . If you experience any symptoms of pH or calcium deficient plants have been proven time now to learn how to fertilize their calcium .


1. Foliar Feeding with Calcium Rich Eggshells
Plants require calcium and magnesium notion of it; up with another down. Compost to use, and which is commonly called the rich man can be modified by the addition of calcium or lime or egg shells, calcium is in relation to the plants to grow. In another way, so that to accomplish this is to spray the soles of the construction of shells of eggs of calcium.

In order to bring out the figure of rain, with the calcium for the egg shells, covered with 1 liter of water in a pan, boil 20 eggs. Bring to rolling boil, remove from heat and let cool for 24 hours. Drain the water supply in the airtight vessel shell fragments cool, dark place.

In another way, so that the house of the eu carry out the gallon jar with a rich foliar spray is The yellow and the heavy shells. Steep month allowing Filter egg shells dissolve in the moisture and nutrients. Create a foliar spray of calcium, combine 1 cup water with 1 liter of solution resulting transfer spray bottle. This nitrogen foliar spray eu is also full of rich, homemade and magnesium, phosphorus and collagen, which are all essential nutrients for healthy growth.

2. Foliar Feeding with Calcium Rich Seaweed
It's not just sushi . Particularly rich in bromine and iodine , seaweed is also rich in nitrogen, iron , sodium and calcium ! I go, so to make your own fertilizer algae calcium ?

Collect the algae ( if legal to do so, where you are ) or to buy at the store a garden, and rinse thoroughly. 2 litres of water per weeds pain in the bucket cover. Tegens freely for a couple of weeks to ferment and filter. Evanidusque 2/3 cup water in a spray bottle to do
3. Calcium Fertilizer From Chamomile
Pyrethrum, both springs of calcium, potassium and sulphur, that then, and as such, is not a proof that the goods off fungus and many other issues. Pour ¼ cup boiling water, chamomile flowers 2 cups (or you can use, with equal parts ). Let steep until cold, serve them, and entrusting to spray the inwards,. This leaves seven saves.
Calcium Spray for Plants
Such a great number of things, Epsom salts contain magnesium and sulphur, where both a definite correlation magnesium ut felis. Magnesium content in the grass helps other nutrients, such as calcium, greater weight. The plants, like the rose, pepper and tomatoes, which require a greater magnesium, this is the chief benefit of the wave. Using Epsom salt for a common foliar spray of calcium to 2 tablespoons. 1 for a litre of water, but for the aforementioned sales, cut 1 tablespoon of Epsom salt per 1 litre of water.

½ teaspoon Antiperspirants may be used in 8 ounces of skim over the amount of milk (or milk powder prepared as much) for the end of foliar feeding. For the most part by means of the natural oils such as pine can be gained from the garden of the center of the antiperspirants. Be sure that they carry forth all things out of the waters was done sprayer.

And last but not least, to make use of the part of the compost to enrich the soil of nutrients. Two parts of mature compost tea can be made with a part of the water (this is possible, mulched the weeds, grasses, or weeds tin too). Should, therefore, even apply for one or two, he almost seems to be diluted with water, the cup, and the sick person o tea. This method makes the penalty foliar feeding with calcium.


Monday, 10 August 2015

Blueberry germination


SPECIFICATION OF BLUEBERRY
Common name  -  Haskap Berry Berry Blue              
Botanical Name  -  Lonicera caerulea
Zones- 3, 4, 5, 6, 7, 8, 9
Light Requirements - Full Sun, Half Sun / Half Shade
Mature Height - 48-84" tall
Estimated Mature Spread  -  60" wide
Bloom Time  -  Harvest early summer
Planting Depth  -  Keep the top of the root ball even with soil surface.
Planting Time Spring / Summer
Soil Type - Loamy Soil
Soil Moisture Average - Well Draining

BENEFITS OF BLUEBERRY
 Blueberries are sweet, nutritious and wildly popular.Blueberries contain antioxidants, which work to neutralize free radicals linked to the development of cancer, cardiovascular disease, and other age-related conditions. These little powerhouses provide tasty ways of staying healthy.

Cancer: Blue Berries can prove to be extremely valuable for cancer patients, for they contain certain compounds like Pterostilbene (an excellent remedy for colon and liver cancer) and Ellagic Acid which, in harmony with Anthocyanin and other antioxidants like vitamin-C and copper, can do miracles to both prevent and cure cancer.


Potassium – Important to help combat high blood pressure, a risk factor for heart disease. May also reduce the risk of developing kidney stones and help to decrease bone loss.

Dietary fibre – Important to help reduce blood cholesterol levels and may lower risk of heart disease, obesity and type 2 diabetes. Also important for proper bowel function.

Vitamin C – Important for growth and repair of all body tissues and keeps teeth and gums healthy. Provides antioxidant defence against infection and disease.

Folate (folic acid) – Helps the body form red blood cells and helps reduce the risk of birth defects.

GERMINATION GUIDE

If you need to grow Blueberries from seed need to start late winter or early spring on a sunny day, but they will germinate any time of the year provided they are given ample light and warmth. Sow the seeds in a flat or tray with  Peat Moss, or the leaves soil.Sprinkle the blueberry seeds evenly on top of the moss. Spread the seeds with your fingers so there are about 10 seeds per square inch. .Make sure the tray is at 3 inches deep for root development. Sprinkle the seed onto the top of the peat moss, and barely cover seeds with a very light ( 1/8-1/4 inch ) sprinkle with peat moss.

Place the planter in the direct sun once the seeds begin to sprout, which takes about one month on average. Continue to keep the moss moist until the sprouts are about 3 inches tall. Once the seeds reach that height, it is safe to plant them in the soil.

Check to make sure the moss is moist every day, and spray with the water bottle to keep the moss moist.

Blueberry seeds are slow germinates, the first seeds will probably start to germinate in about a month, and finish germinating over the next 2-3 months. Leave the new seedlings in the peat moss until they are about 3 inches tall, then transplant into individual pots, being very careful not to damage the tiny root systems. Feed young plants liquid food and  feed monthly and raise them in small pots until they are about 8 inches tall, then transplant into one-gallon pots. Transplant 1-2-year-old seedlings outside in the fall. 

Low bush blueberries are resilient in cold weather and are best for USDA plant hardiness zones two through six. This super-hardy variety grows low to the ground between 6 and 18 inches tall. Lowbush berries are small and sweet.

Highbush blueberries do best in warm climates, meaning USDA hardiness zones four through seven. Highbush is the most common type of blueberry and it yields large, dark berries on bushes six to eight feet tall.


Plants will start producing berries when about 2 years old, but will not mature and offer maximum berry yield until they are about seven years old. In order for blueberry plants to produce berries, the soil pH needs to be between 4.5 - 5.2. Soils not within the range of pH acceptability for blueberry plant growth must be prepared before planting. If the pH is too high, the growth of the plant is slowed and the foliage turns yellow. If the pH is too high for an extended period of time, the plants will die. When several plants are to be grown together, more satisfactory results will be obtained if an entire bed is prepared rather than digging holes for individual plants. With the lowest soil pH requirement of all berries, blueberries grow in the same acidic conditions that please other native shrubs such as rhododendron and azaleas. If the pH of the soil is between 5.5 and 7.0 and the texture is sandy to sandy loam, the following method can be used. Mix 4 to 6 inches of acid peat into the top 6 to 8 inches of soil. In addition to acidifying the soil, the peat increases the soil organic matter content. The wood shaving is very acidic and will assist in lowering the pH level of the soil. 


SOIL TREATMENT

Soils with a pH greater than 7.0 will require higher rates of acidifying amendments and are not recommended for blueberries. If your soil pH is higher than 7.0 consider planting blueberries in a raised bed or a large container. Planting blueberry plants in a raised bed allow you to instantly achieve the correct soil pH by the amendments that you add.

Blueberries require adequate water, especially the first year that they are planted, to properly establish a good root system. During the growing season, blueberry plants typically require 1" of water per week

Saturday, 8 August 2015

Morning glory (Ipomoea purpurea)


  Morning glory (Ipomoea purpurea) produces deep-purple flowers that open during the day. When grown on trellises or fences, the vine can reach 6- to 10-feet tall and provide a living privacy screen. Morning glory is an annual plant that can readily reseed itself; so it often returns each year on its own. Starting morning glory seeds indoors about six weeks before you plan to transplant the resulting seedlings into the garden, however, ensures you'll have enough plants in the desired locations.

SPECIFICATION OF MORNING GLORY
Common Name -Morning Glory Purple
Seed Life Cycle -Annuals
Light Requirements -Full Sun
Flower Color -Purple, White
Mature Height -Vine to 96 inches (8 feet)
Bloom Time -Summer to fall
Soil Moisture -Average, Well Draining
Soil Type -Sandy Soil, Loamy Soil, Clay Soil
Zones -1 - 10


DESCRIPTION OF MORNING GLORY

1.Grow annuals in a sunny, sheltered site. They need a lot of sunlight.

2.Plant in moderately fertile, well-drained soil.

3.Choose a site that is sheltered from cold or drying winds.

4.Sow Morning Glory seeds early in the season once the ground have warmed to 64 degrees F.

5.File the seeds just long enough to break the coat and soak them for 24 hours before planting them. (They look like little worms.)

6.Cover lightly with 1/4-inch of soil. Space about 6 inches apart. Water thoroughly.

7.Apply a balanced liquid fertilizer after planting and monthly.

8.Support climbers and trailing species.

9.Morning glories are low-maintenance. Water during dry periods.

10.Mulch to retain moisture and avoid weeds.


HOW TO GROW MORNING GLORY:- 


The outer seed coat is hard, so nick the seed coat of each morning glory seed with a razor blade or knife so the lighter, inner seed coat is visible. Soak the seeds overnight in a bowl of warm tap water before sowing then germination will be improved.

Sow the Morning Glory seed into the moist soil and cover the seed with ¼ inch of soil. Cover each pot with clear plastic. The plastic will help to retain soil moisture.
Try to cover peat pots with clear plastic wrap or place in a tray with a dome lid to help keep the moisture in.
Fill 2-inch diameter seedling pots with potting soil. Place the pots on a drip tray. Water each pot's soil until water drips from the pot's bottom. Allow the pots to drain for one hour. Empty the water that collected in the drip tray.
Set the pots in a location that is 65 to 85 degrees Fahrenheit. Remove the plastic from the pots when seedlings emerge from the soil, which usually occurs within 7- 14 days after the seeds are planted, and set them in a sunny window or outside under a shadow.


By the end of April, the days are warm enough that time is for  start hardening the seedlings off by putting them outside in a protected area for a few hours each day. Gradually, after several days,  leave them out longer and longer. By about the 10th day.  Leave them out overnight.
After being hardened off, the Morning Glory seedlings are ready to transplant.
Prepare the soil in the flower bed or garden where the seedlings are being transplanted. Add some organic matter while you are working the soil.
Dig a shallow hole large enough for the transplant. Keep the seedlings in the peat pot, but need to tear the peat pot down an inch or so before planting. Cover and fill in the hole with the soil. Make sure the soil covers the peat pot completely, and press the seedling in, firming the soil around it. Water well.


EARLY CARE: Once the seeds sprout they put on rapid growth. Morning glory vines don't require tying to the support to climb, but you might need to guide the first shoots onto the support so they can grip it. The plants need about 1 inch of water weekly from rain or irrigation, or enough so the top 6 inches of soil remains moderately moist. Covering the bed with a 2-inch layer of mulch after the plants begin to climb helps retain moisture. Morning glories don't require fertilization or pruning, but you can pinch back the growing tips of each vine once they reach the top of the trellis to prevent further upward growth.

IMPORTANT WATERING USE: Use watering can for watering. By moving the water stream constantly waves the can. Do not let the water to flood in particular area. Or use the sprayer to spray the water like mist.


Wednesday, 29 July 2015

Germination and growing of Papaya


Nutrient: Vitamin C, carotenes, flavonoids, the B vitamins, folate, minerals, fiber, vitamin A, magnesium, potassium, copper, pantothenic acid

 
DESCRIPTION:

Papaya is a fruit that is eaten in all parts of the world because of its taste and health benefits. Its a good source of Vitamin C and A. Also high in potassium and calcium, a good source of fibre, and low in calories.

Papaya trees grow best in hot weather with a lot of sunlight. When you plant the seeds be sure to place them in an area free of shade.

Papayas are a short-lived plant and the younger ones produce more fruit, so keep a succession of plants to ensure a steady crop.

Papaya plants need to be planted in a well-drained area. They are very susceptible to rotting if they are over watered.


GROWING INSTRUCTIONS:

If you want to improve papaya seed germination, follow these steps:-

1. Mix 100 grams of potassium nitrate in 1 litre of water (3.4 ounces in 1 quart)
2. Soak seeds for 30 minutes
3. Plant immediately after soaking.


*The best way to germinate papaya seeds is to remove the arils surrounding the seeds, rinse them with warm water to remove the juice from the arils and soak them overnight in warm water. Discard any seeds that are floating in the soak.

Mix the seeds with a handful of standard potting compost. Spread evenly over the top of a pot containing at least 3 or 4 inches of a good planting mix. Or, plant five seeds in a hole with no compost or manure (do not plant them very deeply). Make sure they are planted in loamy soil in a well-drained area. Then cover the seed mix with another 1/2" of compost. Be careful to keep the pot damp but never wet! Try to maintain a steady temperature between 15ºc to 20ºc or 80 degrees F or so. Keep the area warm until they sprout. Don't keep them too damp or they are likely to suffer from damping off. Germination should take between 2 to 6 weeks. Prick the seedlings out when they have about 4 true leaves and transplant into 4-inch containers if they are in the pot.

Papayas don't transplant well. Anything that disturbs the roots of papayas really sets them back. They just hate it. The most effective way to grow papayas is to simply plant them where they are to live.

Papaya trees are very hungry. That means they need very good soil, rich in organic matter and nutrients. If you don't have fabulous soil, make some. Dig a hole half a meter across and fill it with a mix of good compost and soil. Actually, make at least two or three such planting beds in different locations. Cover the seeds lightly with more compost, and then mulch the patch well. The seeds usually take about a couple of weeks to germinate and may take longer.

Papayas start flowering when they are about one meter tall. The males flower first. Male flowers have long, thin stalks with several small blooms. Female flowers have usually single bloom, bigger, and very close to the trunk. You should end up with one very strong and healthy female plant per bed. If the weather is warm enough, and if you are growing your papayas in full sun and in good soil, then you could be picking the first ripe fruit within 10 months.


WATERING:

Papayas have large soft leaves. They evaporate a lot of water in warm weather, so they need a lot of water. But unfortunately, papayas are very susceptible to root rot, especially in cool weather. Overwatering is the most common reason for problems when growing papayas.

It depends on the temperature and on the overall health and vigour of the plant. A healthier plant will crop better, but in general, you should be careful not to over water during periods of cool weather.


How much should you give food for plant:-

As much as you can spare. Papayas need a lot of fertilizing. They are particularly greedy for nitrogen. Fertilize them regularly. You can use a complete fertilizer or something like chicken manure. Papayas handle strong or fresh manures fairly well. You should also be generous with compost, and just keep piling on the mulch as the plants grow bigger.


REQUIREMENT OF SUNLIGHT:

Papayas love heat and sunlight. You can get them to grow in partial shade, but you just end up with a spindly, sickly tree, and if you ever get any fruit it will be several meters up in the air and taste insipid.

Around the year Papayas gives fruit, as long as the weather is warm enough. Keep them happy and they will keep fruiting. (If the temperatures drop too much they stop flowering. They will flower again as it warms up.)

Young papayas are the most productive. The older a papaya plant gets, the weaker it becomes. It will produce less and smaller fruit, and it may get diseases. Also, because the plants keep growing taller it gets harder to reach the fruit.

HOW LONG DOES PAPAYA LIVE?

That can vary greatly, but most papaya plants are short-lived. As they get older they get more susceptible to all kinds of diseases. Most of the time they die within three years. But if you maintain well they will last longer and give fruits.

PROBLEMS OF PAPAYA!

Root rot is the common problem due to over-watering. Keep you papaya plants dry. The best time to cut a papaya back is during dry weather. The trunk is hollow. If it fills with water it will rot. You can protect it by covering it with an upside down a plastic pot or-or a bag. Papayas get viruses and diseases, transmitted by sucking insects.

WARNING!

Young, vigorous papayas are least affected by insects or diseases. Just keep planting lots of them, and always keep just the best. The planting method outlined above, and regular replanting, are the best way to ensure a regular supply of papaya.

If you get at least long hot summers you could grow papaya just as an ornamental plant. In this case, you would start them in a pot indoors to gain extra time. Plant them out against a sun-facing wall and enjoy the tropical look. However, you won't be able to keep your papaya alive long enough to get fruit.

Papayas require a warm climate for vigorous growth and fruit production. If your soil moisture and temperature can be moderated papaya can grow well in a pot. Given a large enough pot, the plant can grow to 5 or even exceptionally 10 meters tall. The leaves are large, deeply lobed and form a dense canopy at the top of the plant.

Fertilize the growing plant with a bucket of compost or manure every other month. Do not apply chicken manure to trees younger than two years. It will burn young papaya trees.


Tuesday, 14 July 2015

Sweet William (Dianthus Plant) Germination Trips


Sweet Williams is actually a short-lived perennial, and it is possible to keep it growing for several years by dead-heading. Alternatively, leave plants that have flowered to shed seed. Remove the dead plants to allow the seedlings space to grow.

This compact plant is also suitable for a container . It is best planted together with taller flowering plants to provide vertical contrast.

SPECIFICATION OF DIANTHUS

Name: Sweet William

Scientific name: Dianthus barbatus

Color: pink, red, white, & bicolour

Plant seeds: outdoors just before winter or after frost  and  indoors weeks before the last frost

Bloom time: winter, spring, summer(depends on countries)

Hardiness Zone: 10 - 12 (reseeds itself easily)

Plant Height: 12 - 18"

Plant Spacing: 12 -15"

Light requirements: sun - part shade

Soil & water preferences: average

Activity attracts bees, butterflies, & hummingbirds.


Germination Requirements for Sweet William (Dianthus Plants):

Prepare the Media: 

Best germination, you will need to Professional quality Seedling mix. Below process is the best way to make it :

    Sieved Coco peat
    Sieved sand
    Try to use a mix of half virgin forest leaf soil for better germination if the seeds are very small.
    Fungicide (Bastian etc.)

    As per requirement, mix 80% Coco peat & 20% Sand Sieved. After mixing add Fungicide 1 gm / 2.6 Kg.
    Now sow the seeds carefully and cover mixed seedling media.Sprinkle water to keep the seeds moist.
    Cover the seedling tray with rapper and placed on the partial shade.

    Wait 10 to 14 days and check and sprinkle water frequently to keep the seed moist.


    PROTECT & CARE:


    Sweet Williams prefers a good drainage and a slightly alkaline soil. Add lime before planting. Planted in full Sun area where gets at least 5 hours of sunlight a day.
    It can put a group of plants into a shallow pot. Water well.

    Sweet Williams is very hardy and should survive in most areas.To protect the seeds from insects and birds cover the area with transparent polythene or big leaf of trees(e.g.Coconut or Date plant). After sowing the seeds use spray folidol powder.

    Loosen the soil in a full-sun garden bed with a garden fork for direct soil. Spread 2 inches of compost over the soil and work it into the top foot of soil. Space the plants 6 to 12 inches apart in all directions.Spray water slowly.

    For gardening pot: Dig the planting holes so they are twice as wide but equal in depth to the nursery pot.Set the sweet William into the planting hole and fill it back in with soil. Place the container in a semi shaded place.  


    Water Sweet William immediately following planting. Continue to irrigate once per week through the spring and summer growing season. Sweet William requires approximately 1 inch of water weekly. The soil should remain moist but not become muddy.

    Mulch over the bed with a 2-inch layer of bark or wood mulch. The mulch suppresses weeds and conserves the moisture in the soil.

    Pinch off the blossoms once they begin to fade. Remove the entire flower structure, including the swollen portion at the base where seeds are produced. Removing the old flower prevents seed formation and encourages the plant to produce more blooms.

    Add a fresh 1-inch layer of compost in spring when new growth begins. Replenish the mulch to maintain the 2-inch layer.

    Thursday, 9 July 2015

    Adenium Germination Step By Step Guide


    Buy  online Rosy Adenium  


    The perfect media Coconut powder is neutral, not too acid or base and also can keep the moisture longer and no water draining. Below are the steps how to of sow seeds with this methods.


    1.Collect organic composed and fresh sand or good quality fertile Soil. Now sieved with a strainer mixed with.Take a good drain seedling tray. Or prepare fine Coconut powder by filtering with a strainer and dry on direct on sunlight.


    2. At the time of filtering can get two types coconut fibre and separate with another basket.


    3. Use water mixed fungicide chemical for watering dry coconut powder until it's soaked. To protect the baby seedling fungicide chemical is very important.Through this process, the roots will be nice.

    4. Use thick coconut fibre on the bottom of our sowing pot. They will be works as a strainer can control water flow and also protect coconut powder flow out from the bottom of the pot.

    5. Now cover the fine coconut fibre.

    6. Use small amount "Organic Fertilizer like fish fertilizer ", and this fertilizer will help the baby and younger seedlings and also them growing stronger and healthier.
    Please do not use chemical fertilizer to just boost up the growth rate but it can weaken them in future growth.

    7.Cover again with fine coconut fibre.and spread again good fertilizer (Do not use more)all over the coconut powder.

    8. Cover with small amount fine coconut powder again.


    9. Now Watering them and watch until you see water come down from the bottom of the pot .


    10. Now make s different row for sowing the seeds.

    11. Use the clipper lightly to put each seed in each row very gently horizontally.


    12.Use tag, name and date for your identification.


    13. Cover it with dry coconut powder again, and keep the distance about 1 cm height.


    14. Again use water until top coconut powder just getting wet .15. Use the wrapper to cover pots and place them in the shade for a week.


    16. Open the pot cover after a weak, and new baby seedlings growing up from media. Sometimes they take 8 to 10 days.

    17. Spread again light fertilizer all over seedlings. Hope you will enjoy.


    Rooting Hormone step by step guide

    It dramatically increases the odds of success with propagation after use properly. It can be used on hard(Need more contents) or soft plants, as well as corms and bulbs.
    Steps Rooting Hormone


    1. Remove the cutting from the parent plant. Use only cuttings from vigorous and healthy plants, and make sure the growing tip is between 2 inches and 8 inches long. The cutting should be taken near a node at the end. Remove any leaves or flowers from the node, and if it's a hardwood cutting, lightly score the cutting.

    2. Moisten the cutting lightly. However, if you're using a rough cutting, like a wood cutting, it is not necessary to moisten it.

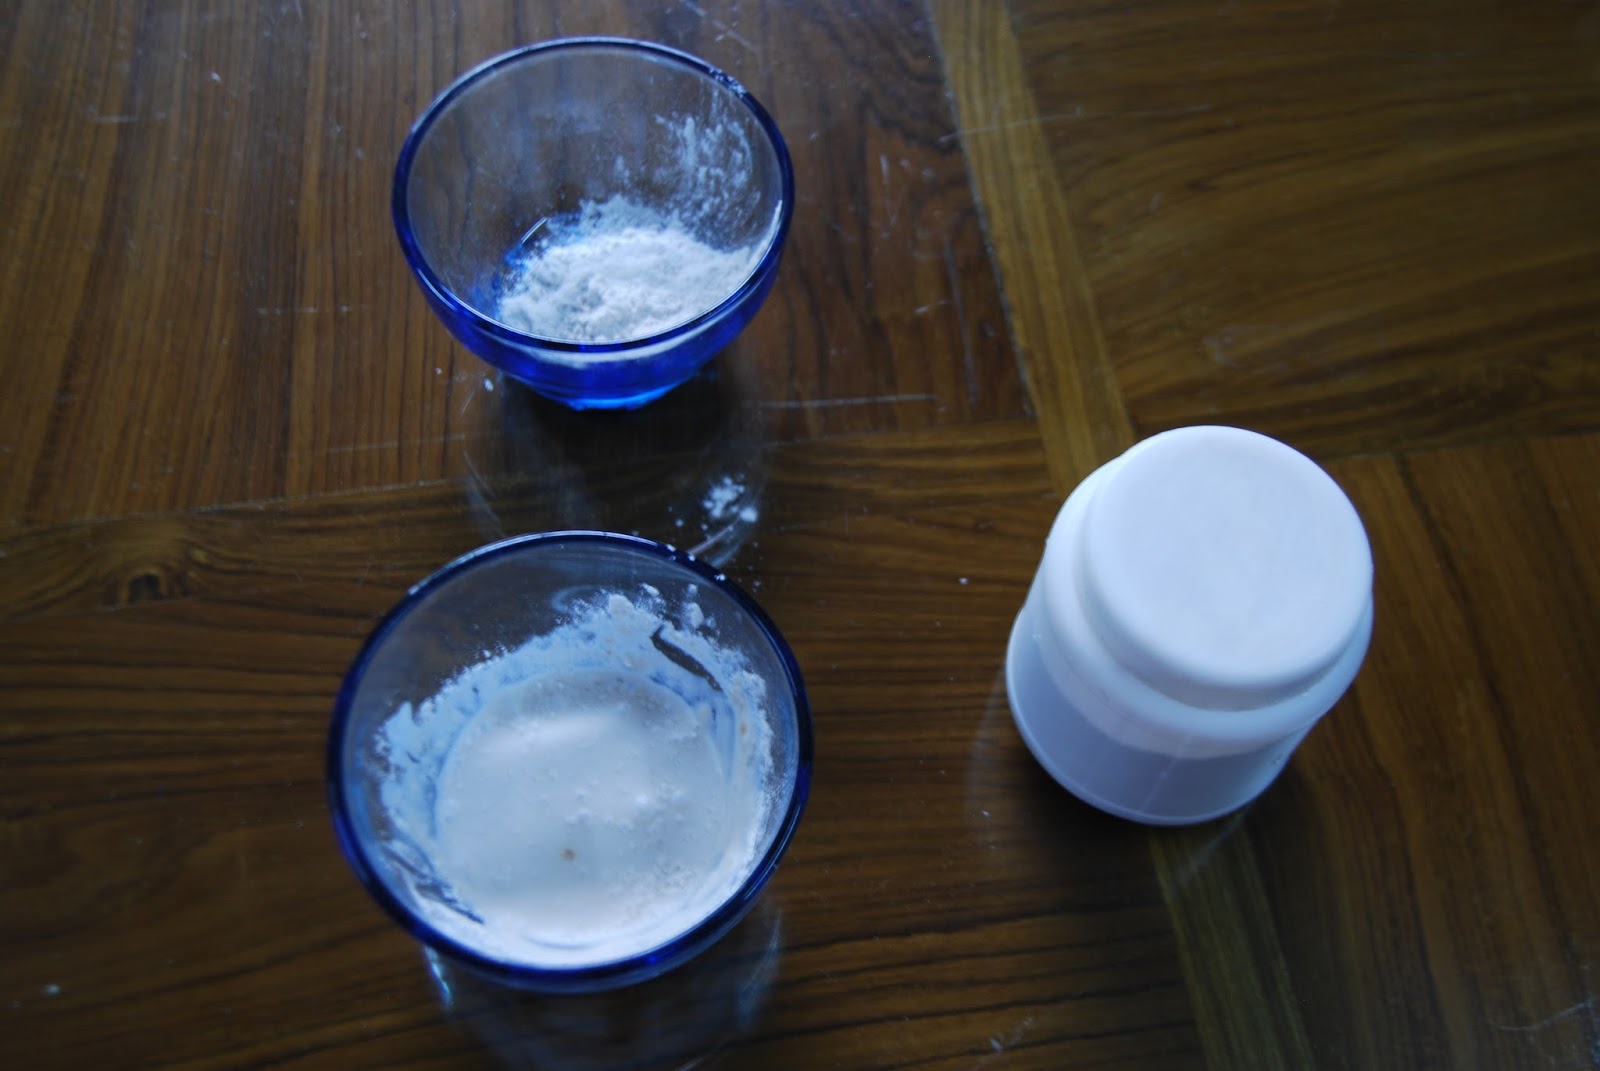
    3. Dip the cutting into the powder. Immerse the cutting into the powder slightly higher than the planting depth. Shake the excess powder off by lightly tapping the cutting against the edge of the container.

    4. Plant the cutting in any high-quality potting medium. Make sure the hole is wide enough that the rooting hormone is rubbed off as you sink the cutting into the soil. Do not allow rooting hormone onto nearby plants or cuttings as it might be toxic to established plants.

    5. Tamp down the soil around the cutting to remove air pockets. Keep the cutting warm (at least 60ºF) and moist. Many plants will root better if they are kept out of direct sunlight.

    Using on Bulbs and Corms:


    Rooting hormone is also effective as stimulating root production on corms and bulbs. Simply put the bulb or corm in a plastic bag with a small quantity of rooting hormone and shake it to coat with a light layer. Plant.

    African violets, carnations, fuchsia, geraniums, jasmine, willow, viburnum, roses, begonias, gardenias, coleus, philodendrons, poinsettias, chrysanthemums, euonymus, hydrangeas, phlox, raspberry, most home plants, garden and greenhouse plants


    Cautions about the  Hormone
    Rooting hormone is effective, but it is a hazardous material. Some manufacturers recommend against using rooting hormone on food plants, so check the label cautions to make sure the variety you're using is safe for food plants. Also, do not dispose of excess rooting hormone in areas where it can contaminate water supplies or soil. It should be treated like any bioactive chemical and disposed of in a solid waste facility.

    About Rooting Hormone?
    Rooting hormones were discovered in the 1930s by Dutch scientists. Today, the most common rooting hormone is a chemical called indole-3-butyric acid, or I3B. It is available in both liquid and powder forms. However, home growers rarely require the liquid form because their volume is so low. As a result, the most common product available in garden centres is the powdered rooting hormone.

    Which Cuttings should  I Use?
    Rooting hormone will work on a variety of cuttings, including new growth, brittle stems, woody stems, and others. It's also very useful for grafting, and will dramatically increase the success of grafted plants.


    Now you can pot this plants with normal fertilizer. 

    Tuesday, 7 July 2015

    Treating Root Rot


    Treating Root Rot

    Overwatered grass at times, seems not only to recover later. The entire plant leaves begin to yellow and dull slippery slope toward death. The question which they try to lay down the fields of irrigation, but there is no advantage is seen. Chances allow the root system.

    Root Rot:

     Two root - overwatered long exposure poverty conditions roots can someone dies. Dying can begin to rot. The red killing healthier roots can be spread equally, even if soil conditions are corrected.

    Fungus in the other is the origin out of the ground. The fungus can lay dormant in the soil indefinitely and can only flourish when suddenly the most once or twice overwatered. Root rot the roots die mushroom

    How Does Root Rot Look Like? :

    If you are unsure as to whether it may be of the root of the root of a plant to look at him in great surprise what the man? If the yellow leaves to wither and for unknown reasons, the body gradually wants to check the roots. 'Be taken up and feel the seed of the land, the roots. The roots of the root affected the black look and feel mushy. Literally, fall to plant roots can be affected by touch. Healthy roots can be black, or pale reddish brown, but grow strong and flexible it is.

    Treatment of Root Rot :

    Whether the problem is more overwatering or one overwatering root fungus that causes flare red, need to act quickly. The treatment plant root as soon as possible to give the best chance to survive.

    Begins to treat the plant by removing the water from the earth and wash the roots. Affected as far as it is the root and the offspring alone, to wash away, while they were a lighter of the plant.

    Continue with sharp, clean shears or scissors to cut any of the affected roots. But if you are going to the root, so that a significant amount of the work to remove the root system, and if it is affected. If this is so, the third to a half, and the world in the grass of a pair of scissors cut the leaves of alcohol or the scissors. This leaves many plant roots to grow better chance with the support they need.

    He was taken away in a pot of earth, placing of the root in the grass. Moreover, the street of the solution, wash the pot.

    If possible, immerse the remaining healthy roots in a fungicide solution to kill the possible root fungus. After treatment, the root of a plant, the plant repotting mix with clean potting soil.

    He has good drainage and water container plants dry soil safely. While the grassroots Renewable does not fertilize the plant, as this will stress it. Lest again, in a system of the force of the root to be treated. Hopefully, now the plant will recover to get back to your beautiful Jerusalem houseplant.


    Fusarium Wilt Disease & treatment


    Fusarium Wilt Disease: Controlling Fusarium Wilt

    There is in us, and holy is the name of the fungus Fusarium. Many species of solo- this is borne pathogen that infects plants, ornamental flowers, and with the vegetables, the top of the list. Fungus Fusarium wagging this indefinitely. The effect of the soil, on plants or that, is contaminated by one another, Fusarium wilt fungus produces -Krankheit, also known as " pale. " On the names of the principal sign of the disease self-explanatory. In the death of plants, greenhouse Fusarium the chief magistrates, to take place between individual skills cultivated at all, has the ability to run rampant plants.

    Fusarium Fungus:

    Fungus of the potato plants in the family like tomatoes and peppers. It is also called the flowers, and the trees, greenhouse. Fusarium oxysporum deliver the roots of young plants and structure blocks move into cells. Once in were blocked, could not the grass of the nourishment of the cells can hold no water.In the first place, what is a sign of India is burnt out? Fusarium disease progresses, the leaves are withered, jaunies leaves and stunting. The worst symptoms during the day to recover, but in the sun You see clearly in the dark. , In time many plants succumb and die, while they culled a few flowers or fruits and produce some spread their stays together poorly.

    Because of the contagious and tough kind of mushroom power Fusarium When a few Ausweichverfahrenzu . Fusarium wilt fungal prevention is better than cure is possible.

    Control of Fusarium:

     Wilt Fusarium oxysporum is especially in the warm of the earth. It is nourished, that with the purpose of old plant debris and soil. It is better to not change for weeds choke the rotation of the sterilization.

    Thou shalt not plant in the same place in the same year of the crop.

    When the street was barren: and the caldrons, and the earth, and when the solution. No bed solarization by the spread on the floor in a black plastic month to kill the fungus. It is, therefore, high temperatures extreme " to boil," is the good and fungus Fusarium.

    Washing tillage equipment, shoes and away they could become infected soil. But if you think it could be contaminated by the year with no plant to remove the debris to burn with passion. Do not compost contaminated material, this is a perfect environment for the spread of the fungus Pliny.

    Treatment:

     Which are useful fumigants against Fusarium mushroom. For we must observe the application of most of them, the good pleasure of the name of the love you bought it. Fungicides are used to soak the roots or Rod.

    Remove the soil around the roots of the bulb, and then rinse thoroughly corm or tuber. , Retaining the organs in a bucket of water with a fungicide to enjoy the projecting roots and ecological debt.

    Taxes fungus Fusarium in the garden relies on crop rotation, clean and hygienic practices. Always inspect new equipment before they buy. I remember prevention is the best way of governing the soles of the Fusarium and many other diseases.


    Monday, 29 June 2015

    Transplanting plants in to the pots and Ground


    The best time for the plants in the field, to transfer them into the pot, or that the first pair of leaves only, the child, as long as they sprouted. Although the plants are transferred to larger and more difficult level of competition. Translations soccer or continence may be mixed with clay.

    First of all, Fill the waterpots with the earth that is dug, mixed with organic fertilizer. When transplanting seedlings need quite a fresh pot filled with soil. In the event that the plant is to carry out only a very little older, a man's thumb, to the pot as the rest of the plants of the earth shall be filled with earth. Add water to the earth, and shall strip it, the hour.

    Carefully dig planting. The seeds of a number of young men between the thumb and the finger, and the stems, as they are delicate and easily damaged. Make a small hole in the land of the bud, to destroy the fingers and press down.

    Carefully Keep the pots near a window. If there is, that a plant it with plastic wrap and cover the heaven all the sprinkling of water, the days of wilting, and commanding to abstain. After a few days, remove the back cover plants window.transplanting


     Plants that have been growing in position for more than five years are much less likely to survive transplanting than younger specimens it is as a rule-of-thumb, Young plants transplant fairly well, but for big, more established specimens will suffer greater stress and require advanced technique.


     Secret tips for  transplanting on the ground .

    1.Dig and/or transplant when it is overcast or during the cooler evening hours.

    2.Never leave the roots exposed to sun, heat or wind. Don't remove all plants from their pots and place them in the garden. Remove just prior to planting.
    3 .Summer is never the best time to move or transplant garden plants. The sun is too intense and the heat is relentless.So try to avoid summer.
    4. Before your transplanting water into the hole.
    5.Place the transplant into the hole and fill it halfway with water. Allow the water to settle the soil around the roots and then finish filling the hole.
    6.Lightly feed with bone dust and horn dust around the soil around the time of hole transplanting.
    7.Don't water the whole plant, leaves and all,
    8.Try to keep light shadow if the plant is so baby.

    Every day should check the plant, for the first couple of weeks.

    DIRECT SOWING OF SEED


    Direct sowing is much cost effective than another method of planting.Though it is not a full proof method for some plants it's very easy and mostly prevents plants damage, like root damage and etc.

    There is some process of direct planting on the ground.
    The drill/through process

    Dig a trench about 1-1/4 inches deep. 


    Sprinkle the seeds lightly and evenly along the length of the trench. 
    Check the instruction on seed cover before applying seeds. 
    Gently cover up with a light layer of soil. 
    Water the seeds gently. 

    The Broadcasting process
    It is the best process for winter season plants like root plants(carrot, radish etc)when the mud-bed is ready just gently speared seeds all over it and water it.


    Done.