Showing posts with label Flower seed. Show all posts

Sunday, 23 April 2017

English Daisy Germination & Care ( Bells Perennis)


English Daisy( Bells Perennis) is a wild flower.It is biennial in its character and it also a hardy plant.It is bloomed especially early spring to early summer.It has many colors like red, white etc.Bells is generally called English Daisy.

SPECIFICATION OF ENGLISH DAISY

Season: Biennial
Height: 12- 18 inches
Bloom Season: spring to summer
Bloom Color: mixed
Environment: Full sun
Soil Type: Loamy, well-drained, pH 6.1 - 7.8
Average Germ Time: 14 - 21 days
Depth: 1/4 inch
Moisture: Keep seeds moist until germination
Plant Spacing: 8 - 12 inches

GERMINATION GUIDE

Step 1

Use a flat seedling tray and its deep will be 5 centimeter. Make sure you have plenty of holes in it for good water drainage.

Step 2
Take equal quantity of sand, soil and vermicompost. Then  mix all the three ingredients into one container.

Step 3

As the seeds are perfect in size then you can put the seeds over it by 1/3 after that cover the seeds with seedling mix only about 1 cm (one centimeter)
If your seeds are so tiny then you can spreed water very lightly and carefully on the seed.Make sure that the water must be mixed with diluted fungicide powder(2 gm in 1 litter water). It is very important  notice to follow that the seeds will not to go very deep inside the mixture by speeding water on the seed, if it happen then the fertilization of the seeds are become difficult.

Step 4
  
Sprinkle diluted fungicide water (2gm in 1 liter water) after sowing the seeds.We have to careful about putting the seed because seeds will not to go deep inside the mixture.

Step 5
 Cover the seedling tray with tightly  plastic polythene wrap over the pot to promote soil moisture  and place it in under  light shadow area . Lift the plastic after three days  to check that the soil  moist or  not. If not, lightly moisten it with a water-filled spray bottle before replacing the plastic.

Step 6
Remove the plastic as soon as the seedlings emerge, and gradually move the pot to a brighter area over a two-week period so that at the end of that time they're acclimated to being in full sunlight.

CARE

  • The plant needs shade in the nursery.High intensity of sunlight is harmful to it.
  • When seedling will be  reached at 4 to 6 leaf soon they will  be transplanted to poly bags.
  • But do it carefully from beds with all roots immediately after transplantation.

Site and soil:

The most important requirement  is a good location with plenty of light. It needs at least five or six hours of good sunlight. It will  perform even better when located in full sun all day. With out  much  light they will produce  fewer flowers.

Spread the organic matter two to three inches thick. Then incorporate it into the soil to a depth of eight to ten inches, using a rototiller or garden fork. This helps open up heavy clay soil, which improves drainage, but can also increase the ability of light, sandy soil always hold moisture and nutrients.


Monday, 27 February 2017

Nastertium Flower Seed Germination ,Growing ,Care, Use .


Nasturtiums are tropical American herbs. It is often used as an ornamental plant for its beautiful red and yellow flowers. Nasturtiums are easy to grow and make a lovely addition to the garden and it is full of vitamin C.

SPECIFICATION OF NASTURTIUM

Bright single blooms
Bright single blooms. Ideal for borders and where the soil is poor.
Height: 30cm(12in)
Plant Class: Hardy Annual (HA). Habit: Bushy, Dwarf.
Soil: Any soil is good for this plant
Sunlight: full sun or partial shade

Sow Indoors:
 Soaking seeds in water overnight prior to planting may speed germination, but nasturtium seeds sprout best when the soil is warm. Poke seeds into the soil about 3 cm deep and 8 cm apart. Thin to 30 cm apart in all directions.

Mix seeds in a growing medium, place in a freezer bag, keep moist, then stratify by refrigeration for two to three weeks.Nasturtium is an easy plant to grow. Put two seeds (1" deep) in each pot and grow them under lights or in a bright location, such as a south-facing window.Use peat pots. Germination time: one to three weeks in the light. Temperature 75°F (24°C). Seven or eight weeks in advance. Transplant outdoors in the last month of spring. It takes about 10 to 12 days for nasturtiums to germinate.


HEATH BENEFIT OF NASTURTIUM

Nasturtium has a vast number of healthy vitamins.

1. Nasturtium's leaves are used as an antibiotic. Eating a couple of its leave can stop from colds and flu.

2.It is enriched with full of Vitamin C.


Saturday, 11 February 2017

Hibiscus Flower Germination ,Growing ,Care, Use and its Benefits.


Hibiscus is an Indian perennial flower. It is known for its large, showy flowers that come in a different range of shapes and colours.Its foliage looked like a large, glossy and yellow in color.It can be purchased or collected from the parent plants.


Sow in early spring for use as an annual
Plant in spring or autumn and grow them on in the greenhouse for their first year to plant them out in early summer of the following year.
For best germination soak seed in hot water for 48 hours before sowing. Change the water ever 12 hours with fresh hot water.
Sow in trays or pots of peaty compost, cover seeds with a sprinkling of sieved compost. Darkness will help germination. Place in a propagator or warm place, maintaining an optimum temperature of 24 to 27°C (75 to 80°F). Plants will flower in 12 weeks from sowing.


SPECIFICATION OF HIBISCUS

Bloom Color: Red,yellow,pink,white,gray
Environment: Full sun
Soil Type: Loamy, well-drained, pH 6.1 - 7.8
Temperature of 24 to 27°C (75 to 80°F)

Average Germ Time: 15 -30 days
Depth: 1/4 inch
Moisture: Keep seeds moist until germination
Sandy Soil, Loamy Soil, Clay Soil


GERMINATION GUIDE

 Hibiscus flower seed germination is not too complicated. Here are some following steps to germinate -

1. The seeds can be sowed 6-8weeks before the last frost is predicted.

2.Make sure that the water must be mixed with diluted fungicide powder.

3.This seed needs to nicking with a knife and then soaking them overnight in warm water.

4.Thereafter the flower seeds can be sowed into a small scalding tray or pot.It must be noticed that the drain pattern of the scalding tray well so that the poured water can be easily come out.

5. Then slowly cover the tray with a plastic polythene and keep the seeds moist not soggy.

6. Keep the temperature constantly warm and the soil consistently moist will aid germination.

7. When the seeds will grow up with small leaves then the plant can be moved to larger pots or direct to the soil.

8.These tender young plants should be introduced to the sun gradually over several days. At this point, a water-soluble fertilizer can be used.

BENEFITS OF HIBISCUS FLOWER

Hibiscus is a beneficial flower plant. Its different parts are used in many different sources. The tea of Hibiscus flower helps to maintain lowering cholesterol, protects the liver, work as anti-cancer properties, weight lose and many others.


Mexican Zinnia Seeds Germination ,Growing and Care.


Mexican Zinnia is beautiful native flower plant can grow to 24 inches. It is a hardy plant grows especially in summer.It needs full sun to germinate its seed.

SPECIFICATION OF MEXICAN ZINNIA


Indoors: March to April
Start indoors four to six weeks before the last frosts.
Gradually acclimatize indoor started seedlings outdoors after all danger of frost has passed and the weather has warmed considerably. Plant out 25 to 30cm (10 to 12in) apart.


GERMINATION GUIDE

  1. Sowing Outdoors in April to July.Dig in a good amount of organic material.
  2. Create a bed on the ground with vermicompost or take seedling tray and cover the tray with vermicompost.
  3. Add compost and all-purpose fertilizer before sowing.As because seeds of zinnia flowers can be sown directly into the sunny flower bed, as developing roots do not like to be disturbed.
  4. Sow the seeds in a container that can be planted directly into the garden later.
  5. Sow seeds after the last frost, and in an area with full of sun. Sow seeds 5 to 7cm (2 to 3in) apart in rows 30cm (12in) apart. Cover seeds with light soil.
  6. Keep soil moist until seeds germinate, in 5 to 10 days.
  7. Grow in fertile, rich, and well-drained soil
  8. Germinate within 7 - 14 days.
  9. the seeds in peat pots, poo pots (pots made from cow dung) or other biodegradable containers that can be planted directly into the garden later. Start seeds four to six weeks before the last frost date in your area.
  10. Read more about Gardening Know How: Zinnia Care – How To Grow Zinnia Flowers https://www.gardeningknowhow.com/ornamental/flowers/zinnia/growing-zinnia-flowers.htm


CARE AFTER GERMINATION


  • When plants are 3 to 5cm (1 to 2in) in height, transplant to 7cm (3in) pots and grow on. Gradually acclimatize indoor started seedlings outdoors after all danger of frost has passed and the weather has warmed considerably. Plant out 25 to 30cm (10 to 12in) apart.
  • Cut above a leaf node to get more flowers.


WATERING :

Watering it daily but do not over-water the plant.


Friday, 3 February 2017

Peony Germination ,Growing ,Care.


Peony is a beautiful annual flower. It is very easy to grow from seed but it takes long years like (3 -5 ). Late summer is good for germination of peony seeds.

SPECIFICATION OF PEONY


Bloom Season: Summer through fall
Bloom Color: mixed
Environment: Full sun
Soil Type: Loamy, well-drained, pH 6.1 - 7.8
Average Germ Time: 14 - 21 days
Depth: 1/4 inch
Moisture: Keep seeds moist until germination
Sandy Soil, Loamy Soil, Clay Soil

GERMINATION GUIDE


Peony can germinate sowing direct to the soil and it will at-least on a cycle of warm-cold-warm before germination.


Step 1

Use a flat seedling tray and its deep will be 10 centimetres, and fill seedling mediator within 3/4  of the rim with a sterile potting soil or sieved vermicompost. Fill the tray with diluted fungicide water (2gm in 1-litre water). Make sure you have plenty of holes in it for good water drainage. And  Allow the soil in the flat to absorb the water through the bottom drainage holes until the soil surface becomes moist.


Step 2

Sow seeds on the soil surface apart 2 in. Press on the seeds lightly with your fingers so they are in full contact with the soil, but don't cover them with soil because they require light to germinate.We have to care about putting the seed because seeds will not go deep into the mixture.  and set the flat inside.

Step 3
Moist again with diluted fungicide water ensure the soil surface it's evenly moist. Cover tightly plastic polythene wrap over the pot to promote soil moisture retention and place it in a 60 to 70 degree Fahrenheit location or in an artificial area of the house that receives indirect light to germinate. Lift the plastic after two days  to check that the soil is moist or not. If not, lightly moisten it with a water-filled spray bottle before replacing the plastic.

Step 4
 
The peony usually sprouts within14 to 21 days.Remove the plastic as soon as the seedlings emerge, and gradually move the pot to a brighter area with six to eight hours of daily sunlight for a two-week period so that at the end of that time they're acclimated to being in full sunlight. Water the seedlings when the soil surface feels dry.

 Step 5

Transplant the peony outdoors or in a new pot when they are about 8 weeks old and about 4 to 6 inches tall. Plant at them 8 to 14 inches apart on the ready ground with same depth were they growing at previously.


GERMINATION CARE
After the seedlings germinate, they can relocate to a sunny south- or west-facing window. The soil is kept moist at all times, but not allowed to get soggy. Once the seedlings have three true leaves, they are fed every two weeks with a liquid houseplant fertilizer. Pinching out the growth tips isn't necessary.


Thursday, 2 February 2017

Nigella plant Germination ,Growing ,Care, and Uses.


Nigella is a colourful annual flower. It has many different colours like 
 pale blue, white, pink etc.

SPECIFICATION OF NIGELLA


Difficulty Easy
Exposure: Full sun
Season: Half hardy annual.
USDA Zones: 3 - 10
Height: 8 to 20 inches (20 to 50 cm).
Bloom Season: Summer through fall
Environment: Full sun
Soil Type: Loamy, well-drained, pH 6.1 - 7.8
Average Germ Time: 14 - 21 days
Sowing Temperature: 20--25C
Growing Temperature: 18--35C
Grow up / Flower days : 80days
Spacing:15×15cm
Colour of Flower: Light blue
Depth: 1/4 inch
Moisture: Keep seeds moist until germination
Plant Spacing: 20-30cm (8-12″).
Soil: Fertile, well-drained soil.
Optimal soil temperature for germination: 18-21°C (65-70°F). Seeds should sprout in 8-15 days.


 GERMINATION GUIDE :

Step 1

Use a flat seedling tray and its deep will be 10 centimetres, and fill seedling mediator within 3/4  of the rim with a sterile potting soil or sieved vermicompost. Fill the tray with diluted fungicide water (2gm in 1-litre water). Make sure you have plenty of holes in it for good water drainage. And  Allow the soil in the flat to absorb the water through the bottom drainage holes until the soil surface becomes moist.

 Step 2

Sow the seeds in prepared beds and gently press them into the surface. Keep moist until the seeds germinate. Because of their lacy foliage, nigella seedlings are easy to recognize among weeds. Nigella usually grows better from direct-sown seeds than from transplanted seedlings.Keep the distance 11" with the other plants.Try to sow seeds two or three times from late spring to early summer, because they stay  only few weeks. Flower colours include white, blue, pink and purple.

Step 3
Moist again with diluted fungicide water ensure the soil surface it's evenly moist. Cover tightly plastic polythene wrap over the pot to promote soil moisture retention and place it in a 60 to 70 degree Fahrenheit location or in an artificial area of the house that receives indirect light to germinate if it planted in a seedling pot. Lift the plastic after two days  to check that the soil is moist or not. If not, lightly moisten it with a water-filled spray bottle before replacing the plastic.


Step 4
 
The Nigella usually sprout within14 to 21 days.Remove the plastic as soon as the seedlings emerge, and gradually move the pot to a brighter area with six to eight hours of daily sunlight for a two-week period so that at the end of that time they're acclimated to being in full sunlight. Water the seedlings when the soil surface feels dry.

 Step 5

Transplant the Nigella outdoors or in a new pot when they are about 4 weeks old and about 4 to 6 inches tall. Plant at them 6 to 8 inches apart on the ready ground with same depth were they growing at previously.


GERMINATION CARE
After the seedlings germinate, they can relocate to a sunny south- or west-facing window. The soil is kept moist at all times, but not allowed to get soggy. Once the seedlings have three true leaves, they are fed every two weeks with a liquid houseplant fertilizer. Pinching out the growth tips isn't necessary.


IMPORTANT WATERING USE: Use watering can for watering. By moving the water stream constantly waves the can. Do not let the water to flood area. Or use sprayer to spray the water like mist


Bells verbena Germination ,Growing ,Care, Use .


Bells Verbena is very hardy plant and it must be soft to germinate.It takes full sunlight and temperature minimum 75 -78 degree F.


SPECIFICATION OF BELLS VERBENA


USDA Zones: 6 - 10
Height: 24 in - 3 ft
Bloom Season: Summer through fall
Bloom Color: green
Environment: Full sun
Soil Type: Loamy, well-drained, pH 6.1 - 7.8
Temperature: 75 - 80F
Lower temperature - 65 – 68°F (18 – 20°C)
Average Germ Time: 14 - 21 days

Depth: 1/4 inch

Moisture: Keep seeds moist until germination
Plant Spacing: 8 - 12 inches


GERMINATION GUIDE


Use a flat seedling tray and its deep will be 5 centimetres. Make sure you have plenty of holes in it for good water drainage.


  Take equal quantity of sand, soil and vermicompost. Then mix all the three ingredients into one container.


As the seeds are perfect in size then you can put the seeds over it by 1/3 after that cover the seeds with seedling mix only about 1 cm (one centimetre).


Sprinkle diluted fungicide water (2gm in 1-litre water) after sowing the seeds.We have to care about putting the seed because seeds will not go deep into the mixture.


It is recommended that sow the seeds directly in early spring when the soil is 50-60°F (10-16°C). Do not cover seed as light is required for germination. Or 6-8 weeks before the last frost in individual 3" pots or cell packs, as plants have taproots and do not transplant well. Make sure that the water must be mixed with diluted fungicide powder.It is very important to notice to follow that the seeds will not to go very deep inside the mixture by speeding water on the seed if it happens then the fertilization of the seeds are becoming difficult.


 Expect germination within 12-21 days at 65-68°F (18-20°C). For the best germination, chill seeds for 1-2 weeks at 35-40°F (18-20°C) before sowing.


Remove the plastic as soon as the seedlings emerge, and gradually move the pot to a brighter area over a two-week period so that at the end of that time they're acclimated to being in full sunlight.


Minimum warm, above 60ºF (15.5ºC), is needed inside the container and it should be placed in the sunny area.After that, the whole thing should be covered with a poly bag and after 21 days later the plastic can be removed.

CLIMATE:

Verbena can be grown in hardiness zone 6-10, although in zone 6 they’re likely to die back to the ground in winter.

LIGHT:

Verbena flower best in full sun (at least six hours per day). Do not cover on that point where you can not see the plastic on the flat or the soil.

SOIL:

Verbena does well in most any kind of soil, as long as it’s well-drained. The ideal soil pH is neutral to slightly acidic.


Tuesday, 31 January 2017

Nicotiana flower seed germination


Nicotina is an annual plant. It produces delicious fragrant that attracts birds and bees.Mostly it is bloomed in summer. The flower can be bloomed all season. It has many colours- red, white, pink, yellow and lavender colours.

SPECIFICATION OF
Scientific name: Nicotiana Alata
Season: Annual and perennial both
USDA Zones: N/A( But reseeds itself, it will act like a perennial)
Height: 36 - 48 inches
Bloom Season: Summer through fall
Bloom Color: Light Pink-White
Soil and Water: Average
Temperature: 75 - 80F
Average Germ Time: 14 - 21 days
Light Required: Sun - part shad
Depth: 1/4 inch

Moisture: Keep seeds moist until germination
Plant Spacing: 15 - 18 inches
Sandy Soil, Loamy Soil, Clay Soil

GERMINATION


Use a flat seedling tray and its deep will be 5 centimeter. Make sure you have plenty of holes in it for good water drainage.

As the seeds are perfect in size then you can put the seeds over it by 1/3 after that cover the seeds with seedling mix only about 1 cm (one centimeter)

Take equal quantity of sand, soil and vermicompost. Then  mix all the three ingredients into one container.

Sprinkle diluted fungicide water (2gm in 1 liter water) after sowing the seeds.We have to careful about putting the seed because seeds will not to go deep inside the mixture.


Thereafter  spreed the Nicotiana seeds on the mixture. If your seeds are so tiny then you can spreed water very lightly and carefully on the seed.Make sure that the water must be mixed with diluted fungicide powder.It is very important to notice to follow that the seeds will not to go very deep inside the mixture by speeding water on the seed, if it happen then the fertilization of the seeds are become difficult.


 Cover tightly  plastic polythene wrap over the pot to promote soil moisture retention and place it in a dimly light area of the house. Lift the plastic daily to check that the soil is moist. If not, lightly moisten it with a water-filled spray bottle before replacing the plastic. Expect germination within three to five days.


Remove the plastic as soon as the seedlings emerge, and gradually move the pot to a brighter area over a two-week period so that at the end of that time they're acclimated to being in full sunlight.


Minimum  warm, above 60ºF (15.5ºC), is needed inside the container and it should be placed in sunny area.After that the whole thing should be covered with a poly bag and after 21 days later the plastic can be removed.

IMPORTANT WATERING USE : Use watering can for watering. By moving the water stream constantly waves the can. Do not let the water to flood area. Or use sprayer to spray the water like mist.


Monday, 30 January 2017

Godetia grandiflora flower seed Germination ,Growing ,Care.


Godetia Grandiflower is an annual flower bloomed in spring.It is also considered as a wildflower.Colors include white, pink, purple, lavender, and red.It is a quickly grown flower.It is a good source of attracting birds and bees.Godetia, also known as Clarkie, Farewell to Spring, and Satin Flower, is commonly grown across the United States, but it is native to western North America. 


SPECIFICATION OF GODETIA

English Name(s): Clarkia, Farewell to Spring
Genus: Godetia
Species: Grandiflora
Variety: Azalea-flowered, Dwarf Double
Family Name: Onagraceae
Moisture: Well-drained
Season: Annual
Hardiness: Hardy
USDA Zones: 3 - 7
Height: 24 inches
Bloom Season: Summer through fall
Bloom Color: Mix
Environment: Full sun
Suitable for: Summer Bedding, Cut Flowers
Colour: Mixed
Flowers: April, May, June, July, August
Soil Type: Most well-drained  pH 6.6 - 7.3
Temperature: 75 - 80F
Average Germ Time: 14 - 21 days
Depth: 1/4 inch
Plant Spacing: 6 - 8 inches
Soil Acidity: Alkaline, Neutral, Acid
Soil Type: Chalk, Sand, Loam

LOCATION AND SOIL
Godetia can be grown in hardiness zone 3 - 7, although in zone 6 they’re likely to die back to the ground in winter.Godetia flower best in full sun (at least six hours per day).


Godetia loves the sunny and warm exposure. It is a tropical plant but very much adaptable to temperate climates with moderate winter, when grown on the ground.Godetia should be planted in soil with lower nutrient levels; it has been known to grow in soils that are sandy, alkaline, or those that contain salt. A Godetia that is planted in nutrient-rich soils will produce more foliage and fewer blooms. For this reason, you should not fertilize Godetia plants with high nitrogen fertilizers or you will get the same result: all foliage and no flower
Godetia does well in most any kind of soil, as long as it’s well-drained. The ideal soil pH is neutral to slightly acidic.

For growing Godetia in pots choose a quality potting mix or make your own substrate using equal parts compost, sand, and soil.


GERMINATION GUIDE

Use a flat seedling tray and its deep will be 5 centimetres. Make sure you have plenty of holes in it for good water drainage.

As the seeds are perfect in size then you can put the seeds over it by 1/3 after that cover the seeds with seedling mix only about 1 cm (one centimetre)


 Thereafter spread the Godetia seeds in the mixture. If your seeds are so tiny then you can spreed water very lightly and carefully on the seed.Make sure that the water must be mixed with diluted fungicide powder.It is very important to notice to follow that the seeds will not to go very deep inside the mixture by speeding water on the seed, if it happen then the fertilization of the seeds are become difficult.

Take equal quantity of sand, soil and vermicompost. Then  mix all the three ingredients into one container. 
Sprinkle diluted fungicide water (2gm in 1 liter water) after sowing the seeds.We have to careful about putting the seed because seeds will not to go deep inside the mixture.

For best results, sow after winter seeds directly outdoors into prepared soil when the  temperatures have warmed up. Sow the flower seeds directly into the ground or into pots. Transplanting it is often unsuccessful. Satin Flower Godetia makes an excellent cut flower.
GERMINATION CARE
After the seedlings germinate, they can relocate to a sunny south- or west-facing window. The soil is kept moist at all times, but not allowed to get soggy. Once the seedlings have three true leaves, they are fed every two weeks with a liquid houseplant fertilizer. Pinching out the growth tips isn't necessary.

Fertilizer and water:

Work a balanced fertilizer such as 8-8-8, 10-10-10, or 12-12-12 into garden soil at a rate of two pounds per hundred square feet. Later--early to mid-July--begin to use liquid fertilizer every three weeks (weekly for "spreading" petunias). Once the plants have begun to spread, it will be much easier to water this solution into the soil than to side dress with dry fertilizer.Incorporate timed-release fertilizer into the soil when planting window boxes or other containers. Otherwise fertilize regularly every two weeks with a liquid fertilizer meant specially for flowering plants. ("Spreading" types require weekly fertilizing.)Leave sprinklers on long enough to soak the soil to a depth of six to eight inches every time you water. Hanging baskets and other containers also need more frequent watering, perhaps as often as daily, depending on their size and the volume of soil they contain.


Tuesday, 24 January 2017

Tikoma Gauri Chaori The Ornamental Flower,Germination ,Growing and Care.


SPECIFICATION OF YELLOW BELL


Season: Annual
USDA Zones: 3 - 10
Height: 12-16 Feet Tall
Bloom Season:  Late spring and all  the summer
Bloom Color: Yellow
Environment: Full sun
Soil Type: Loamy, well-drained, pH 6.1 - 7.8
Temperature: 75 - 80F
Average Germ Time: 14 - 21 days
Light Required: No
Depth: 1/4 inch

Moisture: Keep seeds moist until germination


Sow Outdoors: Surface. Following the last frost. Spacing 4 to 6 inches.
Sow Indoors: Mix seeds in a growing medium, place in a freezer bag, keep moist, then stratify by refrigeration for two to three weeks. Use peat pots. Germination time: one to three weeks in the light. Temperature 75°F (24°C). Seven or eight weeks in advance. Transplant outdoors in the last month of spring.


GERMINATION GUIDE


Use a flat seedling tray and its deep will be 5 centimetres. Make sure you have plenty of holes in it for good water drainage.

As the seeds are perfect in size then you can put the seeds over it by 1/3 after that cover the seeds with seedling mix only about 1 cm (one centimetre)

 Take equal quantity of sand, soil and vermicompost. Then mix all the three ingredients into one container. 
Sprinkle diluted fungicide water (2gm in 1-litre water) after sowing the seeds.We have to care about putting the seed because seeds will not go deep into the mixture.


IMPORTANT WATERING USE: Use watering can for watering. By moving the water stream constantly waves the can. Do not let the water to flood area. Or use sprayer to spray the water like mist


LOCATION AND SOIL
This plants like the sunny and warm exposure. It is a tropical plant but very much adaptable to temperate climates with moderate winter, when grown on the ground.

For growing in pots choose a quality potting mix or make your own substrate using equal parts compost, sand, and soil.


Spider Flower Germination ,Growing ,Care, Use and its Benefits.


The Spider plant is an annual flower.It is known both for its flower shape and its large size.The original name of spider is Cleome.Hot temperature is good for this plant, it requires 70 degrees. Spider seed is very easy to grow and it can be grown in anywhere.

SPECIFICATION OF SPIDER

Season: Annual
USDA Zones: 3 - 10
Height: 36 - 42 inches
Bloom Season: Summer and fall
Bloom Color: Violet
Environment: Full sun
Soil Type: Moist, well-drained, pH 6.6 - 7.5
Temperature: 68F
Average Germ Time: 10 - 21 days
Light Required: Yes
Depth: Do not cover
Sowing Rate: 2 - 3 seeds per plant
Moisture: Keep moist until germination
Plant Spacing: 18 inches
GERMINATION GUIDE

Step 1

Use a flat seedling tray and its deep will be 10 centimetres, and fill seedling mediator within 3/4  of the rim with a sterile potting soil or sieved vermicompost. Fill the tray with diluted fungicide water (2gm in 1 liter water) . Make sure you have plenty of holes in it for good water drainage. And  Allow the soil in the flat to absorb the water through the bottom drainage holes until the soil surface becomes moist.


Step 2

Sow seeds on the soil surface apart 2 in. Press on the seeds lightly with your fingers so they are in full contact with the soil, but don't cover them with soil because they require light to germinate.We have to care about putting the seed because seeds will not go deep into the mixture.  and set the flat inside.

Step 3
Moist again with diluted fungicide water ensure the soil surface it's evenly moist. Cover tightly plastic polythene wrap over the pot to promote soil moisture retention and place it in a 60 to 70 degree Fahrenheit location or in an artificial area of the house that receives indirect light to germinate. Lift the plastic after two days  to check that the soil is moist or not. If not, lightly moisten it with a water-filled spray bottle before replacing the plastic.

Step 4
 
The Spider usually sprout within 10 to 21 days.Remove the plastic as soon as the seedlings emerge, and gradually move the pot to a brighter area with six to eight hours of daily sunlight for a two-week period so that at the end of that time they're acclimated to being in full sunlight. Water the seedlings when the soil surface feels dry.

 Step 5

Transplant the Spider outdoors or in a new pot when they are about 8 weeks old and about 4 to 6 inches tall. Plant at them 8 to 14 inches apart on the ready ground with same depth were they growing at previously.


IMPORTANT WATERING USE: Use watering can for watering. By moving the water stream constantly waves the can. Do not let the water to flood area. Or use sprayer to spray the water like mist


GERMINATION CARE
After the seedlings germinate, they can relocate to a sunny south- or west-facing window. The soil is kept moist at all times, but not allowed to get soggy. Once the seedlings have three true leaves, they are fed every two weeks with a liquid houseplant fertilizer. Pinching out the growth tips isn't necessary.

CLIMATE:

Spider flower can be grown in hardiness zone 6-10, although in zone 6 they’re likely to die back to the ground in winter.

LIGHT:

Spider flower best in full sun (at least six hours per day).

SOIL:

Spider do well in most any kind of soil, as long as it’s well-drained. The ideal soil pH is neutral to slightly acidic.


Night Jasmine Flower Seeds Germination ,Growing , And Care.


Night Jasmine flower is known for it's beautifully fragrant and its beautiful glossy foliage. Jasmines can easily grow both outdoors and indoors.It will be grown 6-8 feet if it can place properly. Jasmines are especially bloomed at night and with the nice fragment.

SPECIFICATION OF JASMINE

It is perennial
Season: Annual

Bloom Season: From Winter  to Summer
Bloom Color: White
Environment: Full sun
Soil Type: Loamy, well-drained, pH 6.1 - 7.8
Temperature: 75 - 80F
Average Germ Time: 14 - 21 days
Depth: 1/4 inch

Moisture: Keep seeds moist until germination
Plant Spacing: 8 - 12 Feet

Sow Outdoors: Surface. Following the last frost. Spacing 4 to 24 inches (10 to 60 cm).

Sow Indoors: Mix seeds in a growing medium, place in a freezer bag, keep moist, then stratify by refrigeration for two to three weeks. Use peat pots. Germination time: one to three weeks in the light. Temperature 75°F (24°C). Seven or eight weeks in advance. Transplant outdoors in the last month of spring.


GERMINATION GUIDE

Most important: Avoid Rainy day or a cloudy weather for sowing the seeds.
You will definitely get nothing, wait for the bright sunny day and clear weather.


Use a flat seedling tray and its deep will be 5 centimetres. Make sure you have plenty of holes in it for good water drainage.

As the seeds are perfect in size then you can put the seeds over it by 1/3 after that cover the seeds with seedling mix only about 1 cm (one centimetre). Thereafter spread the Jasmine seeds on the mixture. If your seeds are so tiny then you can spread water very lightly and carefully on the seed.Make sure that the water must be mixed with diluted fungicide powder.It is very important to notice to follow that the seeds will not to go very deep inside the mixture by speeding water on the seed if it happens then the fertilization of the seeds have become difficult.


 Take equal quantity of sand, soil and vermicompost. Then mix all the three ingredients into one container. 
Sprinkle diluted fungicide water (2gm in 1-litre water) after sowing the seeds.We have to care about putting the seed because seeds will not go deep into the mixture.


 Cover tightly plastic polythene wrap over the pot to promote soil moisture retention and place it in a dimly lit area of the house. Lift the plastic daily to check that the soil is moist. If not, lightly moisten it with a water-filled spray bottle before replacing the plastic. Expect germination within three to five days.


Remove the plastic as soon as the seedlings emerge, and gradually move the pot to a brighter area over a two-week period so that at the end of that time they're acclimated to being in full sunlight.


Minimum warm, above 60ºF (15.5ºC), is needed inside the container and it should be placed in the sunny area.After that, the whole thing should be covered with a poly bag and after 21 days later the plastic can be removed.

LOCATION AND SOIL
Jasmine loves the sunny and warm exposure. It is a tropical plant but very much adaptable to temperate climates with moderate winter, when grown on the ground.

For growing Jasmine in pots choose a quality potting mix or make your own substrate using equal parts compost, sand, and soil.


Saturday, 21 January 2017

Balloon flower Germination ,Growing ,Care, Use and its Benefits.


Balloon flower is a native plant.It has many colours like pink, white, blue and many others.During the fall of frost, it is turned into golden color.It has beautiful fragrant that is why many butterflies attract with it. Balloon flower required full to partial shade.

SPECIFICATION OF BALLOON FLOWER


Season: Annual
USDA Zones: 3 - 10
Height: 12" - 18"
Bloom Season: Late Spring, and again in late summer
Bloom Color: Purple
Environment: Full sun
Soil Type: Loamy, well-drained, pH 6.1 - 7.8
Temperature: 75 - 80F
Average Germ Time: 14 - 21 days
Depth: 1/4 inch

Moisture: Keep seeds moist until germination
Plant Spacing: 6- 8 inches

GERMINATION GUIDE

Most important: Avoid Rainy day or a cloudy weather for sowing the seeds.
You will definitely get nothing unless you wait for the bright sunny day and clear weather.


Use a flat seedling tray and its deep will be 10 centimetres, and fill seedling media ( OR Take equal quantity of sand, soil and vermicompost. Then mix all the three ingredients into one container.)  within 3/4  of the rim with a sterile potting soil or sieved vermicompost.

Fill the tray with diluted fungicide water (2gm in 1-litre water). Make sure you have plenty of holes in it for good water drainage. And  Allow the soil in the flat to absorb the water through the bottom drainage holes until the soil surface becomes moist.


Sow seeds on the soil surface apart 2 in. Press on the seeds lightly with your fingers so they are in full contact with the soil, but don't cover them with soil because they require light to germinate.

We have to care about putting the seed because seeds will not go deep into the mixture.  and set the flat inside.
Moist again with diluted fungicide water ensure the soil surface it's evenly moist. Cover tightly plastic polythene wrap over the pot to promote soil moisture retention and place it in a 60 to 70 degree Fahrenheit location or in an artificial area of the house that receives indirect light to germinate.

Lift the plastic after two days  to check that the soil is moist or not. If not, lightly moisten it with a water-filled spray bottle before replacing the plastic.

The Balloon flower usually sprouts within 14 to 21 days.Remove the plastic as soon as the seedlings emerge, and gradually move the pot to a brighter area with six to eight hours of daily sunlight for two-week period so that at the end of that time they're acclimated to being in full sunlight. Water the seedlings when the soil surface feels dry.


Transplant the Balloon flower outdoors or in a new pot when they are about 8 weeks old and about 4 to 6 inches tall. Plant at them 6 to 8 inches apart on the ready ground with same depth were they growing at previously.


FERTILIZING
Balloon are fast growers and heavy feeders and benefit from regular applications of fertilizer. Mature trees may require as much as 1/2 pound actual nitrogen per year. Apply fertilizer monthly, just prior to heavy pruning.


GERMINATION CARE
After the seedlings germinate, they can relocate to a sunny south- or west-facing window. The soil is kept moist at all times, but not allowed to get soggy. Once the seedlings have three true leaves, they are fed every two weeks with a liquid houseplant fertilizer. Pinching out the growth tips isn't necessary.

LOCATION AND SOIL
Balloon loves the sunny and warm exposure. It is a tropical plant but very much adaptable to temperate climates with moderate winter, when grown on the ground.

For growing guava in pots choose a quality potting mix or make your own substrate using equal parts compost, sand, and soil.


Viper's Bugloss Flower Seed Germination ,Growing ,Care, Use and its Health Benefits.


Viper bugloss is a native plant.It is used as a border and the buds of start off pink at first, the flowers turn the most exquisite shades of intense blue and as the flowers fade they become tinged with crimson.

Sow Outdoors: Surface. Following the last frost. Spacing 4 to 24 inches (10 to 60 cm).

Sow Indoors: Mix seeds in a growing medium, place in a freezer bag, keep moist, then stratify by refrigeration for two to three weeks. Use peat pots. Germination time: one to three weeks in the light. Temperature 75°F (24°C). Seven or eight weeks in advance. Transplant outdoors in the last month of spring.


SPECIFICATION OF BUGLOSS

CLIMATE:
Viper bugloss can be grown in heard ness zone 6-10, although in zone 6 they’re likely to die back to the ground in winter.Viper's bugloss is a biennial which requires free draining reasonably open grassland or disturbed soil in which its seed can germinate.Viper's bugloss has a deep and persistent root which allows it to exploit free draining, drought prone land. Viper bugloss like humid climates. Once established, they can tolerate quite a bit of drought.


LIGHT:
viper bugloss flower best in full sun (at least six hours per day).

SOIL:
viper bugloss do well in most any kind of soil, as long as it’s well-drained. The ideal soil pH is neutral to slightly acidic.


Prepare the area where they are to grow. Removing any weeds or stones and rake to a fine tilth. Sow thinly, 6mm (¼in) deep in drills 30cm (12in) apart. Sow the seed sparingly or they will choke out other seedlings. Water ground regularly until the seedlings are established, especially in dry periods. Optimum germination temperature: 60 to 65°F (15 to 18°C).
If sowing more than one annual in the same bed, consider marking the sowing areas with a ring of sand and a label. The seedlings will appear in rows approx 6 to 8 weeks after planting and can be easily told from nearby weed seedlings.
Prick out superfluous seedlings rigorously, so that the plants are at least 38cm (18in) apart. They will then have enough space to spread satisfactorily.
GERMINATION GUIDE


Germination in seedling tray

Use a flat seedling tray and its deep will be 5 centimeter. Make sure you have plenty of holes in it for good water drainage.

As the seeds are perfect in size then you can put the seeds over it by 1/3 after that cover the seeds with seedling mix only about 1 cm (one centimeter)

 Take equal quantity of sand, soil and vermicompost. Then  mix all the three ingredients into one container. 
Sprinkle diluted fungicide water (2gm in 1 liter water) after sowing the seeds.We have to careful about putting the seed because seeds will not to go deep inside the mixture.


Sow the seeds should be sown directly outdoors where it is to flower in spring or autumn. They prefer well drained soil in full sun or part shade. The seed can also be sown indoors, but direct sowing is preferable, as they have a long taproot which can be damaged when transplanting. Make two or three successive sowings for continuous flowers.

Caution
This striking species is best viewed and not touched. The sharp spines, which cover the plant, are a powerful deterrent and can be a skin irritant; becoming lodged in the skin much like those of a cactus. If you are tempted by the Viper, please use gloves when handling the plant!


Plant Uses
Flowers Borders and Beds, Patio/Container Plants, Cut Flower, Wildlife and wildflower meadows. Bees and Honey making. Butterfly gardens, Drought Tolerant.


Chrysathemum Flower Seed Germination Growing ,Care, Use.


Chrysanthemum comes from the Greek language it is sometimes affectionately shortened to "mum".Mum plants are easiest  of all all the perennials in garden.It is cold whether plant.It is bloomed especially in early spring and it can be placed almost any time.

SPECIFICATION OF MUM

Season: Perennial
USDA Zones: 3 - 10
Height: 50 - 70 inches (vining)
Bloom Season: Summer through fall

Environment: Full sun
Soil Type: Loamy, well-drained, pH 6.1 - 7.8
Temperature: 75 - 80F
Average Germ Time: 14 - 21 days
Depth: 1/4 inch

Moisture: Keep seeds moist until germination
Plant Spacing: 8 - 12 inches
Sowing: February - June
Water: Medium  


Chrysanthemum Indicum will grow in almost every type of soil but prefer chalky, well-drained soil and in full sun or semi shade. Chrysanthemum Indicum is a fully hardy flowering mid to late summer. Plants may need supporting in exposed areas. Soak plants before planting them out. This allows them to take up the maximum amount of water without doing any injury to the plant. Deadhead faded flowers to promote a constant supply of fresh blooms. Lift and divide overcrowded clumps in spring or after flowering late summer. Cut old stems to ground level in autumn.


GERMINATION GUIDE

Step 1

Use a flat seedling tray and its deep will be 10 centimetres, and fill seedling mediator within 3/4  of the rim with a sterile potting soil or sieved vermicompost. Fill the tray with diluted fungicide water (2gm in 1-litre water). Make sure you have plenty of holes in it for good water drainage. And  Allow the soil in the flat to absorb the water through the bottom drainage holes until the soil surface becomes moist.

 Step 2

Sow seeds on the soil surface apart 2 in. Press on the seeds lightly with your fingers so they are in full contact with the soil, but don't cover them with soil because they require light to germinate.We have to care about putting the seed because seeds will not go deep into the mixture.  and set the flat inside.

Step 3

Moist again with diluted fungicide water ensure the soil surface it's evenly moist. Cover tightly plastic polythene wrap over the pot to promote soil moisture retention and place it in a 60 to 70 degree Fahrenheit location or in an artificial area of the house that receives indirect light to germinate. Lift the plastic after two days  to check that the soil is moist or not. If not, lightly moisten it with a water-filled spray bottle before replacing the plastic.


Step 4

 The Chrysanthemum seeds usually sprout within seven to 14 days. Remove the plastic as soon as the seedlings emerge, and gradually move the pot to a brighter area with six to eight hours of daily sunlight for a two-week period so that at the end of that time they're acclimated to being in full sunlight. Water the seedlings when the soil surface feels dry.


Friday, 20 January 2017

Armeria maritima seed germination ,Growing ,Care, and Use.


America maritima is known as ' sea thrift'. It is also very tolerant of copper and can grow in areas of high copper soil content where most other plants will die.


SPECIFICATION OF AMERICA MARITIMA

Season: perennial
USDA Zones: 3 - 10
Height: 8 - 10 inches
Bloom Season: Summer through fall
Bloom Color: Yellow
Environment: Full sun
Soil Type: Well-drained, pH 5.8 to 6.8
Temperature: 70F
Average Germ Time: 14 - 21 days
Light Required: full sun
Depth: 1/4 inch
Sowing Rate: 2- 3 seeds per plant
Moisture: Keep seeds moist until germination
Plant Spacing: 8 - 12 inches
Cold treatment: 7 - 10 days


Description:   

Sea Thrift is a useful edging plant consisting of tufts of a narrow 4-8 inch long linear, grass-like leaves that spread to form small colonies over time. Held well above the foliage on 12 inch-tall thin, leafless stems are 1-1 ½ inch diameter dome-shaped blooms comprised of many small flowers. Blooms occur in shades of mauve to rosy-pink and last for about three weeks. Plants are sturdy, durable and tolerant of light foot traffic and salt water spray.


Uses/Culture:  

Suitable for container gardening, cottage gardens, edging, mixed beds and borders, and walkways. Plants perform best in sunny, well-drained areas of the garden with some afternoon shade provided. Sea thrift also grows well in other less than ideal conditions, including clay and poor, sandy soils. Sow seeds direct to garden in late summer for blooms the following season or indoors under warm, humid conditions 4-6 weeks prior to last expected spring frost in your area for first season blooms.


Germination Requirements: 

Most important: Avoid Rainy day or a cloudy weather for sowing the seeds.

You will definitely get nothing unless waiting for the bright sunny day and clear weather.
Please check the forecast before sowing the seeds on the following website :
http://www.msn.com/en-gb/weather?wealocations=wc:inxx0038
Select your Area
Check the local weather. It will let you know whether forecast for about 7 days of your city

Use a flat tray container about 10 inches by 15 inches (biggest or smaller your choice) 1.5 to 2 inches deep. Make sure you have plenty of holes in it for good water drainage.Take equal quantity of sand, soil and vermicompost. Put the seedling mix you prepared up to almost top leaving about 0.5 inches space. Soak the seeds in warm water for 8 hours before sowing.

As the seeds are perfect in size now we can put the seeds over it by 1/3 after that cover the seeds with seedling mix only about 0.5 cm (half a centimetre). Water it by watering can.Germination occurs in 2-3 weeks under warm, moist and humid conditions. place the container in a semi-shaded place. Sprinkle diluted fungicide water (2gm in 1-litre water) after sowing the seeds.We have to care about putting the seed because seeds will not go deep into the mixture.


Site and soil
The most important requirement for growing seasonal flower seeds successfully is a location with plenty of light. Seeds need at least five or six hours of good sunlight but not direct, under semi-shadow they'll perform even better when located in full sun all day. The more shade they receive, the fewer flowers they'll produce.

It's always useful to improve the garden soil by conditioning it with organic matter, such as baled peat moss, well-rotted leaf compost or manure.
Spread the organic matter two to three inches thick. Then incorporate it into the soil to a depth of eight to ten inches, using a rototiller or garden fork. This helps open up heavy clay soil, which improves drainage but can also increase the ability of light, sandy soil to hold moisture and nutrients.

If you intend to sow Armeria seeds outdoors, they should be sowed on the surface and lightly covered with soil in the early spring or early autumn. If you prefer to grow seedlings indoor then seeds should be prepared about ten weeks before they are due to be put out (early spring).

Wednesday, 18 January 2017

White Pansy Seed Germination,Growing and Care.


White pansy is a seasonal plant which grows both during the winter and summer.It has beautiful fragrant and it uses many medicinal purposes.It has many colours in it.It likes moist, full sun, soil and well drained.It may be annuals, perennials and hardy biennials.


SPECIFICATION OF WHITE PANSY

Season: Annual and Biennial
USDA Zones: 5 -9
Height: 5 to 8 inches
Bloom Season: Summer through fall
Bloom Color: White
Sunlight: Full sun to partial shade
Soil Type: Loamy
Temperature: 75 - 80F
Average Germination Time: 15 - 25 days
Depth: 1/4 inch

Plant Spacing: 4 - 5 inches


CULTIVATION

Pansies perform best in cooler weather and are therefore usually planted in spring or fall. They like rich, well-drained soil high in organic matter, and full sun or partial shade.

GERMINATION  

1. Place the pansy seeds in a moistened paper towel and gently fold it to cover the seeds. Set the towel in a plastic resealable bag and place it in the refrigerator for 14 to 20 days. Check the paper towel daily and moisten as necessary with a fine mist of water from a spray bottle. Do not allow the seeds to dry out or they will not germinate. If kept wet and cool, the pansy seeds will start to germinate within two to three weeks.

2. Fill the seeding pots with potting soil and water it. Plant the seeds in the pots 1/8 inch down into the soil and space them 1/2 inch to 1 inch away from each other. Store the pots in a room with average temperature ranging from 65 to 70 degrees Fahrenheit. Set a black plastic bag over the pots as pansy seeds require darkness to germinate. Monitor them and water daily to keep the soil moist. When the pansies sprout and seedlings emerge from the soil, remove the plastic bag.


3. Fertilize your pansies with liquid fertilizer when the first green leaves appear on the seedlings. When the first three true leaves pansies appear, move the seedlings to individual pots with drain holes. Set them in a sunny area with temperature 50 degrees Fahrenheit.

4. Prepare the flower bed by adding organic fertilizer such as manure to the soil. Turn the soil of the flower bed over a couple of times to thoroughly mix in the fertilizer. Plant the pansies after the last frost, in full sun where there is moist, well-drained soil, 4 to 5 inches apart.


GROWING TIPS

Pansies will flower even more profusely and longer if spent flower heads are removed. During the hottest months, cut the plants back and mulch to conserve moisture.


Wednesday, 11 January 2017

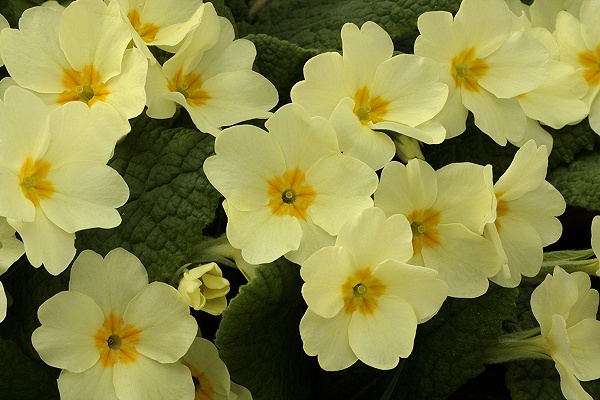
Primrose flower seed germination


Primrose is a biennial plant grows in America.It can be started from seed.It has a benefit, it can be sowed directly in the soil.Frost is harmful to this plant or seed.It is a fragrant flower plant.

SPECIFICATION OF PRIMROSE

Height :36-60" tall
Sunlight: full sun
Soil: Sandy Soil, Loamy Soil
Zone:7, 8, 9
Flower colour: mixed
Life cycle: biennials
Bloom time: summer
Water: average
Spacing: 18 to 24"

GERMINATION GUIDE
Most important: Avoid Rainy day or a cloudy weather for sowing the seeds.
You will definitely get nothing unless you wait for the bright sunny day and clear weather.

Primrose is very easy to grow. Sow the seed direct to the soil or can use a big a ready pot for til to flowering.

Use a flat seedling tray and its deep will be 10 centimetres, and fill seedling media to within 3/4  of the rim with a sterile potting soil or sieved vermiculite as a professional media . Fill the tray with diluted fungicide water (2gm in 1-litre water). Make sure you have plenty of holes in it for good water drainage. And  Allow the soil in the flat to absorb the water through the bottom drainage holes until the soil surface becomes moist.


Sow seeds after soaking the seeds overnight on the soil surface apart 2 in. Since the seeds were tiny, need to cover with sieved vermiculite dust for a  light covering. This way the seeds will hide . Do not put the seed deep inside so be  careful about putting the seed because seeds will not go deep into the mixture.

Moist again with diluted fungicide water ensure the soil surface it's evenly moist. Ideal germination temperature is between 12 and 15 degrees Centigrade. Lower temperatures do no harm, but anything over 18 Centigrade is fatal.


 Inspect regularly and water as necessary. Do not allow the compost to dry out.The Primula usually sprout within 15  to 20 days.As soon as the seeds sprout remove the cover. Protect against slugs. Polyanthus and primrose sprout within three weeks. Few species are slower and may take six weeks. Most of the species need natural freezing and thawing to get them started so it's important to sow as early as possible.

Use a dilute fungicide water for this sprinkling as a prophylactic against damping off.
Gradually move the pot to a brighter area with six to eight hours of daily sunlight for a two-week period so that at the end of that time they're acclimated to being in full sunlight. Water the seedlings when the soil surface feels dry.


Transplant the Primula outdoors or in a new pot when they at least four leaves. Plant at them 8 to 14 inches apart on the ready ground with same depth were they growing at previously. Primulas establish much faster if a good root system has developed before they are moved. Wait until you have at least four leaves before you pick out.

Sow Outdoors: Surface. Following the last frost. Spacing 4 to 24 inches (10 to 60 cm).

Sow Indoors: Mix seeds in a growing medium, place in a freezer bag, keep moist, then stratify by refrigeration for two to three weeks. Use peat pots. Germination time: one to three weeks in the light. Temperature 75°F (24°C). Seven or eight weeks in advance. Transplant outdoors in the last month of spring.

BENEFITS OF PRIMROSE

1. Primrose contains much of fatty acid.

2.Primrose oil is helpful to heart.

3.Primrose oil is used to reduce hair-fall.


Wednesday, 30 November 2016

Hollyhock Seed Germination


Botanical Name: Alcea rosea

Life Cycle: short-lived perennial, biennial

Planting Time: spring or fall

Height: plants vary in size from 3' to 7' tall

Exposure: full sun or light, part-day shade

Soil: average to rich, well-drained soil

Hardiness: biennial or short-lived perennial zones 2-9

Bloom Time: late summer to fall

Flower: variety of color shades including pinks, reds, yellows, whites and maroon-blacks

Foliage: green leaves on upright stems holding flower spikes  


HOW TO GROW

  • Work a 2-inch layer of compost into a well-drained garden bed. Select a site that receives at least six hours of direct sunlight, and isn't prone to standing water at any time. Smooth the soil surface with a rake after amending.
  • Sow the hollyhock seeds directly on the soil surface, because they require light to germinate. Space the seeds 6 inches apart in rows set about 18 inches apart. Press on the seeds lightly so they have full contact with the soil, but do not cover them.

  • Mist the bed with a gentle spray of water, so the seeds aren't washed away. Water as needed to keep the soil moist until the seeds germinate, which takes approximately 14 days.

  • Water the hollyhocks about once a week, providing about 1 inch of water each time. Water frequently enough so the top 6 inches of soil doesn't dry out completely. Keep the foliage dry when watering, to minimize fungal disease problems.


Tuesday, 29 November 2016

Neem Seed Germination Tips


Neem is commonly called divine tree commonly found throughout greater parts of India, Bangladesh and Pakistan. These fast-growing shade trees can survive drought and grow well in poor soil. And, the leaves, fruit and seeds are edible. The trees commonly grow 50 to 75 feet tall and can live for 200 years. The simplest way to propagate neem trees is by seed.
 

SPECIFICATION OF NEEM:

Height :12 to 18
Flower : white or pale yellow, small, scented.
Bark : Grey or dark reddish brown with numerous and scattered tubercles.

BENEFITS OF NEEM:
  • Neem contains Vitamin C, which helps in getting rid of skin problems like blackheads, pigmentation, dullness and aging, thus leaving the skin with a youthful glow.
  • Neem leaf has anti fungal and antibacterial properties, making it effective in treating dandruff.
  • Traditionally, neem paste is used to condition the hair and scalp.
  • Neem is mentioned in most Ayurveda formulations for the treatment of skin disorders because of its detoxifying properties.
GERMINATION:

Use a flat tray like container of 2 inches depth. Make sure you have plenty of holes in it for good water drainage. Put the seedling mix leaving about 0.5 inches space. Evenly spread the seeds over it and cover the seeds with seedling mix. Sprinkle water thoroughly and place the container in a semi shaded place. 

Cover tightly  plastic polythene wrap over the pot to promote soil moisture retention and place it in a dimly lit area of the house. Lift the plastic daily to check that the soil is moist. If not, lightly moisten it with water before replacing the plastic. Expect germination within three to five days.

Remove the plastic as soon as the seedlings emerge, and gradually move the pot to a brighter area over a two-week period so that at the end of that time they're acclimated to being in full sunlight. 

TIPS:
  • For the seedling mix take equal quantity of sand, soil and vermicompost and mix all the three ingredients into one container.
  • Sprinkle diluted fungicide water (2gm in 1 liter water) after sowing the seeds.We have to careful about putting the seed because seeds will not to go deep inside the mixture.
  •  The water used to sprinkle must be mixed with diluted fungicide powder.