Showing posts with label Wild flower. Show all posts

Thursday, 20 September 2018

Hepatica Liverwort: Description


                                Hepatica Liverwort
One of the  most beautiful woodland wildflowers is Hepatica Liverwort.The mature plants are in height of 4-6" and 6-9" wide. The flower is the colour of  pink, blue and white. Some even take on a picotee coloring, with stunning white-edged purplish petals. The foliage colour is green. Three lobed leaves appear after blooms. Each plant is approximately the size of a healthy African violet. An easy-to-grow must-have species for all shady gardens. Some parts of the plants are poisonous or toxic to the animals if ingested.

Common Name : Hepatica, Liverwort

Botanical Name: Hepatica acutiloba

Light Requirements : Half Sun / Half Shade, Full Shade

Flower Color: Pink, Blue, White

Flower Size : 1" flowers

Mature Height : 4-6" tall

Foliage Color : Green

Soil Type  :Loamy Soil, Moist/Wet Soil, Acidic Soil

Advantages Bee Friendly, Native, Multiplies / Naturalizes


Red Trillium: Plant description & Propagation


                                      Red Trillium

One of the most famous members of the famous Trillium family, the Red (or Purple) Trillium is also known as Wake Robin. This beautiful wildflower is one of the easiest Trilliums to grow, since it is tolerant of acid or alkaline soils. The  blooms are up to 4 in. across, and held high above the leaves on upright plants to 16 in. tall.The foliage is slender green stalk with three large connected leaves. Blossoms leave a berry-like fruit. The flower has sometimes lemon flovour scent.Some parts of the plants are  poisonous or  toxic to the animals if ingested.

.
Common Name :Wake Robin, Stinking Benjamin, Purple Trillium

Botanical Name :Trillium erectum 

Flower Color : Red

Flower Size : 1-2" flowers 

Foliage Color : Green

Mature Height : 6-18" tall

Light Requirements : Half Sun / Half Shade, Full Shade

Soil Type : Loamy Soil, Moist/Wet Soil

Advantages : Deer Resistant, Rabbit Resistant, Fragrant, Native, Multiplies / Naturalizes

Propagation:

Trillium plants are propagated from seed. Trilliums such as The Great White spread very slowly by underground root stocks, and the seed produced creates new plants even more slowly. From a planted seed, it takes approximately five to nine years for a Trillium grandiflorum plant (the Great White Trillium) to bloom. So when you see a massive drift of these in spring,  looking at a bunch of plants that are at least a decade old, probably much older.


Indian Pink: Plant description & Planting


                                      Indian Pink

Indian Pink is kind of perennial vibrant red color flower.The unusual blooms are trumpet shaped with a red exterior, yellow inside, and a unique flare at the top that forms a star shape.Indian Pink is also known as woodland pinkroot. The plant is easy o grow and glossy green oval lance shaped foliage.


Common Name : Indian Pink

Botanical Name : Spigelia marilandica

Light Requirements :Half Sun / Half Shade, Full Shade

Flower Color : Red

Flower Size : 1-2" flowers

Mature Height : 12-18" tall

Foliage Color : Green

Soil Type : Loamy Soil, Drought/Dry Soil, Moist/Wet Soil

Advantages : Attract Hummingbirds, Easy to Grow, Native

Planting Depth : Plant so that the top of the root is 1" below the soil line.


Planting:

Its best to be planted in late summer or early fall to ensure summer blooms. It’s a favorite among butterflies and hummingbirds. Indian Pink should be planted along the wood edge or in a shaded garden. Its growing nature prefers neutral, well-drained soils.

Sunday, 27 September 2015

A to Z Germination tips

Different Germination Tips & Articles


Mail: contct@shiatoshi.com


Saturday, 26 September 2015

Universal Germination Guide


  Growing your Seeds

Most important: Avoid rainy day or a cloudy weather.

You will definitely get nothing; wait for the bright sunny day and clear weather.

Please check the forecast before sowing the seeds on the following website:


1.       Select your Area.
2.       Check the local weather. It will let you know whether forecast for about 7 days of your city.

If you got problems with rats then take care of them because they will dig and eat seeds and you will never know what happened or they will cut and eat your seedlings in early stages.

This guide applies to all kind of fruits, vegetables and flower seeds (excluding Exotic Fruit Variety). For best germination, you have to place your seeds in the refrigerator for about 40 to 50 days. This will destroy all unnecessary microorganisms. After this, start germination process ending the Dormancy period.

Now prepare your soil for seeds:
1.       Coco peat Sieved
2.       Sand Sieved 
3.       Fungicide (Bavastin, etc.)

You should make professional quality seeding mix for best germination. 

Follow the steps below:

1.       Prepare fine Coconut powder by filtering with a strainer and dry it directly on sunlight.

2.       At the time of filtering, you can get two types coconut fibre separately with another basket.

3.       Use thick coconut fibre on the bottom of our sowing pot. They will be working as a strainer can controlling the water flow and it will also protect coconut powder flow from out of the bottom of the pot.

4.       Use water mixed fungicide (Bavastin, etc.)  chemical for watering dry coconut powder until it's soaked. To protect the baby seedling, fungicide chemical is very important. Through this process, the roots will be nice.

Secret Tips for tiny or very small seeds:

·         Try to use a mix of half virgin forest leaf soil for better germination if the seeds are tiny.
·         Mix 80% Coco peat & 20% Sand Sieved. After mixing add Fungicide 1 gm / 2.6 Kg.
·         Now your seeding mix is ready.
 Coco peat is basically finely cut coconut outer fibre because of its great ability to hold water (moisture), helping proper seeds germination providing air space for the roots, light in weight and easy to handle. Thus, makes it the best soilless germination media for seeds in the modern horticulture industry.
 Today almost all commercial growers in the world use this as growing and germination medium because it sterilized. It does not contain any fungus that can kill or destroy seeds at germination and at seedlings early stages. It is very easy to find it at any gardening stores or nursery. It’s sold as solid compressed blocks of many weights and sometimes in prepared ready to use condition, starting from 1 Kg. to 5 Kg. cost of Coco peat is around INR 30 to 50 per Kg. depending on the quality. 1 Kg. of Coco peat block will become about 4 to 5 litres in volume. After buying, you just have to add water to submerge and wait for 20 minutes. It requires a rather big container from its size because it expands almost 4 to 5 times in volume after getting moist.

Follow these steps below for growing a healthy plant:

1.       Use a Seeding tray or soil seedling pot: Put seeding mix then put one seed in every Cavity about 5mm deep (not too deep and not too shallow). Cover it with seeding mix and place the seedling tray in shaded place.
                                                                    OR

2.       Use a flat tray container about 10 inches by 15 inches (biggest or smaller your choice) 1.5 to 2 inches deep. Make sure you have plenty of holes in it for good water drainage put the seedling mix you prepared up to almost top leaving about 0.5 inches space now evenly spread the seeds over it after that cover the seeds with seedling mix only about 0.5 cm (half a centimeter)  water it by watering can è place the container in semi-shaded place.

3.       Watering tips: Use a watering can for watering. By moving the water stream constantly waves the can. Do not let the water to flood in particular area. Or use a sprayer to spray the water like mist.

4.       Very essential: After sowing the seeds in coco peat for best germination cover the pot with clear plastic wrapper until they are germinated. Remove the plastic once in 2 days for about 20 to 30 minutes to have a good air circulation (do not give water if not needed). After that, again cover the pot with the clear plastic wrapper, this will act like you are using a Seeds Incubator. It helps a lot to maintain humidity, raises the temperature and protects seeds from rats and birds.

5.       Important tips about Coco Peat: It may look as the seedling mix is dry from outside but it will be wet from inside. Always check the seedling mix by scratching it by hand that it is wet or dry from inside.

6.       Watering it on need base so check regularly for watering. Do not over water the plants.


After seeds germinate you will wait till seedlings get more than 6 leaves. After that, you need to transplant the plant to where you want. Remove your seedling from the tray. Make sure that whole seedling mix is also removed from the tray with your plant. Do not try to remove seedling mix from the roots. Take them out as a whole, otherwise, the root of the plant will lose moisture during transplantation. Spray fungicide and insecticide every 20 days or as per need, fertilize every 20 days. Now you have got healthy plants.

Reference  link  :https://www.shiatoshi.com/blog

Wednesday, 13 May 2015

Wild Flower Seeds Germination And Care


Wildflowers are important in supporting our native insects and animals. Not only do they encourage high biodiversity, they also make a pretty and colourful addition to the garden. The most attractive way to grow wildflowers is by planting a meadow, although they can be grouped formally in beds and borders to great effect. A quintessential part of the British countryside, wildflower meadows are an important part of our environment and an excellent, wildlife-friendly alternative to lawns and borders.

Choose a spot on your property that gets 6 or more hours of direct sun a day (unless you are planting our Partial Shade Mixture).

Prepare your soil be clearing the area of all existing growth. Simply dig up everything that is growing, turn the soil and rake the area flat. If this is an area that has never before been gardened, you may need to till the area up to remove the growth.

Mix the seeds with sand for better visibility and scatter the seeds directly on top of the soil. If you are sowing a larger area, we recommend using a seed spreader; if not, you can sow by hand.

We recommend lightly compressing the seeds into the soil, making sure not to bury them. You can either walk on them, use a board or if you are sowing a larger area, rent a seed roller.

Grow Water so that the soil is moist, not soaking wet until the seedlings are about 4-6" tall. After that, the seedlings will survive on natural rains. If you are experiencing very dry weather, we recommend watering occasionally.

GERMINATION DAYS

The average time period in which a particular variety will germinate given optimum conditions. Please allow a variance of plus or minus 25%.

Optimal soil temperature for germination:

The optimum temperature for degrees Fahrenheit for rapid germination. A steady temperature between the published limits, based on laboratory data, is recommended for best results.

Sowing depth:
An increment in inches has been included for each variety as a quick reference for optimum sowing depth. A good rule to follow, if in doubt about any variety, is to sow the seed at a shallow depth.

SURFACE NOW:

Due to the extremely small size of the seed, the area should be prepared and the seed sown directly on the surface of the soil, then pressed or rolled in. DO NOT COVER.

A seed contains an embryonic plant in a resting condition, and germination is its resumption of growth. Seeds will begin to germinate when the soil temperature is in the appropriate range and when water and oxygen are available. However, most of your wildflower seeds will only germinate between specific soil temperatures. Optimum soil germination temperatures will vary greatly from one species to another. With soil temperatures extremely low or excessively high, the growth of the seed is either slow and erratic or germination is entirely prevented. Not all of your seeds will sprout at the same time due to constant temperature fluctuations typically observed in nature.

The most common cause of poor germination associated with wildflowers is the depth at which the seeds are sown. Small seeds should be planted on the soil surface and pressed or rolled in for best results since they contain only enough stored food for a limited period of growth. If the seedling is to survive, it must emerge from the soil and quickly begin to produce its own food. If seeds are too deeply buried beneath the soil surface, the seedling will either exhaust its food reserve prior to reaching the soil surface causing its death, or lack of sufficient oxygen will prohibit germination altogether.

GERMINATION

Within the descriptive literature of each species, we have listed the following germination data to assist you in your planting.

  As prepare a planting mix with the sand, soil and vermicompost=>Sprinkle diluted fungicide water (2gm in 1-litre water) after sowing the seeds. Make a hole in the potting mix with your finger=>Insert each seed in a hole as 1/3=>Place the planted pots or flats in a warm, above 60ºF (15.5ºC), sunny place=>too wet is quite dangerous for the seeds to keep the potting soil moist but not too wet until the seeds emerge, which should be in about 21 days=>cover the mixture with poly bag=> after 21 days  you can remove the plastic.

Garden Vegetable and Flower Seeds
Standard garden annuals, plants such as tomatoes, peppers, corn, poppies, lettuce, etc. are in general, some of the easiest seeds to germinate. A world apart in germination ease from some of the tropicals, most will germinate rapidly (within days to a week or two) under standard conditions. A few, such as the peppers can be trickier, so read some of our comments below. For the most part, garden annuals need minimal pre-treatment and germinate fairly well in regular soil and with moderate water. Soil temperature requirements vary, with certain seeds such as tomatoes and peppers germinating best in warmer soils and others such as lettuce, may germinate well in cooler soils.

 WARNING

1. Do not sow seeds on Rainy day or in a cloudy weather

2. You will definitely end up with nothing, wait for the bright sunny day and clear weather

3. Please check forecast before sowing the seeds on the following website


Balsam Flower seeds Germination and Growing


Mixed Color Balsam Flower

While today's impatiens, a shade-loving hybrid of African species, was virtually unknown in gardens until after World War II, balsam, which is native to Southeast Asia, was a well-known favourite by 1900. Balsam grows well in both sun and shade, and we recommend areas with some protection from afternoon sun. It sprouts in only 4-5 days and flowers early, growing to be 12-24" tall. The narrow plants hold their blooms close to the central stem. Victorian gardeners removed some leaves to better display the 2" across, perfection pink, camellia-like blossoms.

Growing Balsam is easy.

Balsam is a Victorian garden favourite. It is a quick growing summer annual flower, with gardenia-like blooms. Continuous blooms grow on top of a bushy plant with glossy leaves. You will get blooms in about 60-70 days. Balsam is a member of the Impatiens family. Colors include shades of white, pink, rose, violet, and red. Balsam is native to Asia, North America, and South Africa. There are annual and perennial varieties.

Balsam are often grown in containers on balconies and terraces. Use large pots to provide plenty of space for them. Balsam also is a good bedding or edging plant.

SPECIFICATION OF BALSAM

Plant Height: 14" - 20"

Flowers Bloom: Long flowering, from summer through fall.
Days to Germination: 10 - 15

Lifecycle: annual
Ease-of-care: easy
Height: 1 to 2.5 feet
Spread: 1 to 1.5 feet


PLANT PROPAGATION

Balsam are grown from seed. They can be directly seeded into your flower garden, or seeded indoors in trays or flats for transplanting later. Sow indoor starts about 6 weeks before the last frost. Keep soil moist while germinating.

Sow seeds early in the season, and cover with 1/8" of soil. Water thoroughly. It is important to keep the soil moist during the germination period.

Balsam will begin to produce a continuous, profusion of flowers by early to mid-summer, and all the way to frost.


GROWING DETAILS OF BALSAM
Balsam likes full to partial sun. Shade the plants from the afternoon sun, especially in hot regions.

They prefer a rich, well-drained soil. Space plants 12-18 inches apart. Water them during dry periods, once or twice per week. Don't allow the roots to remain wet. Add a general purpose fertilizer regularly for optimum growth.

Once established, Balsam will grow well and bloom continuously well into fall. Annual varieties are susceptible to frost.

GERMINATION GUIDE
 Ã¨Use a flat tray container about 10 inches by 15 inches (biggest or smaller your choice) 1.5 to 2 inches deep. Make sure you have plenty of holes in it for good water drainage
è put the seedling mix you prepared up to almost top leaving about 0.5 inches space
è now evenly spread the seeds over it after that cover the seeds with seedling mix only about 0.5 cm (half a centimetre)
è water it by watering can 
è place the container in semi-shaded place.  


As prepare a planting mix with the sand, soil and vermicompost
=>Sprinkle diluted fungicide water (2gm in 1-litre water) after sowing the seeds. Make a hole in the potting mix with your finger
=>Insert each seed in a hole as 1/3
=>Place the planted pots or flats in a warm, above 60ºF (15.5ºC), sunny place
=>too wet is quite dangerous for the seeds to keep the potting soil moist but not too wet until the seeds emerge, which should be in about 21 days
=>cover the mixture with poly bag
=> after 21 days you can remove the plastic.

Insect and Disease:

If insect or disease problems occur, treat early with organic or chemical insect repellents and fungicide.

Kochia Burning Bush Germination and Care

Kochia Burning Bush


Life Cycle:Half hardy annual. Hardy annual.
Height: 15 to 36 inches (40 to 90 cm).
Flowers details:Light green, then turn to Red. Hairy flowers that sprout from strap shaped leaf axils.
Foliage:Lancelot. Flattened. Green through to red.
Flowers:Summer
Growing Regions:Zones 2 to 10.
Requirements:Soil pH 6 to 7. Average soil. Drought tolerant. Regular feed.
Light:Full sunlight.

GROWING INSTRUCTIONS

SOW OUTDOORS:  Before last frost. Spacing: single plants: 20 to 24 inches (60 to 70 cm); hedging 8 inches (20 cm).
SOW INDOORS
: Soak seeds overnight. Use peat pots. Germination time: one to two weeks in the light. Temperature 70°F (21°C). Seven or eight weeks in advance. Transplant outdoors towards the end of spring.

 GERMINATION GUIDE

   Ã¨Use a flat tray like container about 10 inches by 15 inches (biggest or smaller your choice) 1.5 to 2 inches deep. Make sure you have plenty of holes in it for good water drainage
è put the seedling mix you prepared up to almost top leaving about 0.5 inches space 
è now evenly spread the seeds over it after that cover the seeds with seedling mix only about 0.5 cm (half a centimetre) 
è water it by watering can 
è place the container in a semi shaded place.  


Step 1 :

Fill a pot with water that equals five times the seed volume and bring it to a boil on a stove. Check the temperature of the water with a cooking thermometer, and when it reaches 176 degrees Fahrenheit, remove the pot from the stove.

Step 2:

Place the kochia seed tree seeds in the hot water and stir them for up to two minutes with a spoon before draining the liquid.


Step 3:
Fill a bowl with lukewarm water that's between 86 and 104 degrees Fahrenheit and soak the seeds in it for 24 hours. This pre-treatment is called scarification and alters the hard seed coat, which increases the chances of uniform germination.

Step 4:

Fill a pot with moist seed-starting mix up to 1 inch from the top, place the seed on top of the surface and cover it with a 1/2-inch layer of the mix. Tamp down lightly and moisten the surface with a water-filled spray bottle to avoid washing away the seed.

step 5:

Cover tightly  plastic polythene wrap over the pot to promote soil moisture retention and place it in a dimly lit area of the house. Lift the plastic daily to check that the soil is moist. If not, lightly moisten it with a water-filled spray bottle before replacing the plastic. Expect germination within three to five days.

Step 6:

Remove the plastic as soon as the seedlings emerge, and gradually move the pot to a brighter area over a two-week period so that at the end of that time they're acclimated to being in full sunlight.

Step 7:

Transplant the seedlings outside to an area with full sun and well-draining soil after three to five months, when the seedlings are about 8 to 12 inches tall.


IMPORTANT WATERING USE
 Use the watering can for watering. By moving the water stream constantly waves the can. Do not let the water to flood in particular area. Or use the sprayer to spray the water like mist.

WARNING

1.Use fungicide powder removes fungus. So use 2 gm  fungicide with  10 litre water and spray after spread or before spread those seeds.

2. Do not sow seeds on Rainy day or in a cloudy weather

3. You will definitely end up with nothing, wait for the bright sunny day and clear weather.
4.   Please check forecast before sowing the seeds on the following website


Yellow evening primrose, oenthera lamarckiana

YELLOW EVENING PRIMROSE, OENOTHERA LAMARCKIANA


SPECIFICATION OF PRIMROSE

NAME: Evening Primrose

PLANTING TIME: Outdoors- after frost / Indoors- weeks before the last frost

BLOOM TIME: Late Spring - Summer

PLANT HEIGHT: 24 - 60 inches

PLANT SPACING: 12 - 15"

LIGHT REQUIREMENTS: Full Sun

OTHER: These fragrant beauties get their name because they only bloom at night! It also attracts bees, butterflies and birds.

USES: The plant can be harvested at any time for culinary purposes. The flowers are the preferred parts for medicinal purposes, but all parts are useful. Best time to collect plants for medicinal use is when the plant is in flower during autumn. The essential oil is readily available in commercial products.

Warning: Expert supervision is recommended when using the essential oil for medicinal purposes. Do not use this herb if suffering from epilepsy.


GERMINATION GUIDE
1. Always sow seeds on a sunny day. Soak the seeds before sowing.
2. Fill the germination container with soil mix and saturate it with water. Allow the container to drain completely and then saturate it again to ensure that it is evenly wet. Set the container aside until the mix is moist.
3. Sprinkle the seeds on the surface of the mix and cover with a scant 1/8-inch layer of sand or vermiculite.
4. Place the container on a heat mat and set the temperature at 68 degrees Fahrenheit from sundown to dawn and 86 degrees during the day. Keep the soil moist during germination, and the seeds will sprout within three weeks.
5. Transplant the strongest seedlings when they have their third set of leaves. Choose a sunny spot in the garden and plant them at the same depth they were growing in the germination container.
6. Keep the soil moist until the primrose begins flowering.

 Use a flat tray container about 10 inches by 15 inches (biggest or smaller your choice) 1.5 to 2 inches deep. Make sure you have plenty of holes in it for good water drainage- put the seedling mix you prepared up to almost top leaving about 0.5 inches space-now evenly spread the seeds over it after that cover the seeds with seedling mix only about 0.5 cm (half a centimeter) water it by watering can place the container in semi-shaded place. 

WARNING


1.Do not sow seeds on Rainy day or in a cloudy weather

2. You will definitely end up with nothing, wait for the bright sunny day and clear weather

3. Please check the forecast before sowing the seeds on the following website :


r Purple Climbing Rose seed germination and care

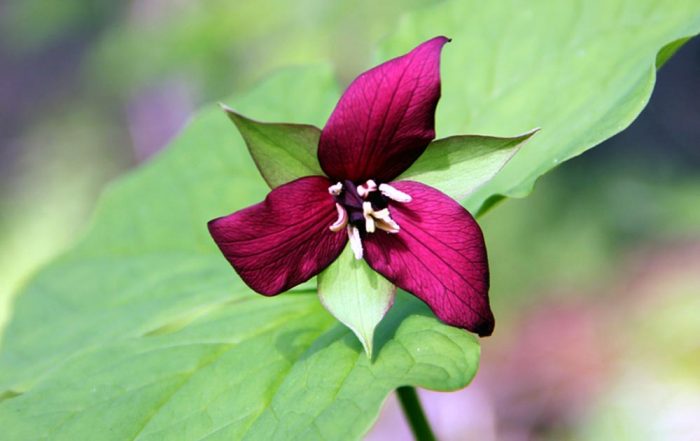
SPECIFICATION OF PURPLE ROSE
Height: 7-12 feet
Germination time: Around 40 Days
Blooming Season: Early, Mid & Late Summer
Sun Requirements: Partial Shade, Partial and Full Sun
Description: Climbing roses are a popular plant for vertical gardens. Interestingly, botanists do not consider them true climbing plants like vines because they don’t grow their own support structures to hold onto a surface. Therefore, they need a helping hand and a vertical space to attach to and grow on.

GERMINATION GUIDE

Rose germination using sulfuric acid

1. Place the seeds in a damp material. Rose seeds typically won't sprout unless they are kept in cold, wet conditions, mimicking a winter environment. Place the seeds between two layers of lightly dampened paper towels, or in a container of dampened salt-free river sand, peat moss, or vermiculite.

2.Soak the seeds in diluted Sulphuric Acid: A mixture of water and sulfuric acid may reduce surface thickness on the seeds. Stir (10 ml) sulfuric acid into 1 cup (240 ml) water.[2] Keep the rose seeds in this solution for at least half an hour.

Use a strainer and wash it plain water.Use seeds for sowing or can it for a week.
A light dusting of anti-fungal powder use on plants for more affect.It will remove the fungus.

3.Leave the seeds in the fridge for several weeks. Put the seeds and moist material in a plastic bag or seedling tray in a plastic bag or seedling trays, and keep them in a cold area of a refrigerator, such as an otherwise empty crisper drawer.
Do not keep them in the same area of the refrigerator as fruit or vegetables, which can release chemicals that prevent the seeds from developing

4..Keep the seed medium slightly damp. Check at least once or twice a week to see whether a sprout has emerged from the seed casing. Add a few drops of water to each paper towel whenever they begin to dry out. Depending on the rose variety and individual seeds, the seeds could take anywhere from four to sixteen weeks to germinate. Often, 70% or more of the seeds never sprout at all.

· After sprout:...

1.Fill a container with sterile seed starting mix. Small seedling starting trays make it easy to care for many seeds at once. Alternatively, use plastic drinking cups with a hole punched in the bottom, to make root growth easier to view.
Regular soil is not recommended, as it may not drain well enough and cause the seedlings to rot.

2.Plant the seeds. Some store-bought seeds can be planted immediately. If you germinated your own seeds as described above, plant them as soon as they begin to sprout. Plant with the sprout pointed downward, as this is the root. Lightly cover them with soil, about 1/4 inch (6 mm) deep. Space seeds at least 2 inches (5 cm) apart to minimize competition.
Sprouted seeds should emerge as seedlings within a week. Store-bought seeds that do not require home stratification may take several weeks. Seeds that have not been stratified, using the germination process above, may take two or three years to emerge.

3.Keep the seedlings in warm, moist soil. Keep the soil damp, but not soggy. A temperature between 60 and 70ºF is(16–21ºC) is ideal for most rose varieties. The seedlings typically thrive on six hours of sun or more each day, but you may wish to research the parent rose's variety to get a better idea of what your roses prefer.

4.Learn when it's safe to transplant seedlings. The first two leaves visible are usually "cotyledons," or seed leaves. Once the seedling grows several "true leaves," with a more typical rose leaf appearance, it is more likely to survive transplanting. Transplanting is also easiest in winter or early spring, not during the height of the growing season.

CARE FOR YOUR ROSES
 Once the transplanted seedling is looking healthy again, you can start watering it as normal. Fertilizing a few times during the warm growing season may help your plant grow and bloom if you follow the fertilizer instructions, but keep in mind that some varieties of rose will not bloom at all during their first year of life.


IMPORTANT WATERING USE: Use watering can for watering. By moving the water stream constantly waves the can. Do not let the water to flood in particular area. Or use the sprayer to spray the water like mist.


Mimosa pudica sensitive magical plant


Mimosa pudica sensitive magical plant :
Mimosa pudica (from Latin: pudica "shy, bashful or shrinking"; also called sensitive plant and the touch-me-not), is a creeping annual or perennial herb often grown for its curiosity value:
the compound leaves fold inward and droop when touched or shaken, re-opening minutes later. The species is native to South America and Central America but is now a pantropical weed.
Pretty puff-ball flowers of pink and fern-like leaves that quickly fold once touched: the sensitive plant is a wonder of the plant world. A tender perennial that becomes semi-wood yin frost-free regions, it is often short-lived and is most popularly grown as an annual.The leaves are bright green to grey-green in colour and are shaped like a four-fingered hand.

SPECIFICATION OF MIMOSA PUDICA
Sowing Temperature: 20-26C
Growing Temperature: 18-40C
Spacing: 10*10CM
Grow up / Flower days : 60days
Height when growing up:20-30CM
Color Of Flower: Pink

DESCRIPTION:
So-Called Sensitive Plant, Because The Leaflets Floyd Up In A Most Spectacular Manner When Is Touched Or Blown By The Wind. Run Your Hand Over The Plant And The Leaves Will Fold Up And Return To Normal Condition In A Few Minutes. Favor To A Sandy Well-Drained Soil. Keep Soil Damp But Not Wet. Do Not Exclude Light. Overwinter Indoor And Temperature Above 10C.

GERMINATION GUIDE:
Use a flat tray container about 10 inches by 15 inches (biggest or smaller your choice) 1.5 to 2 inches deep. Make sure you have plenty of holes in it for good water drainage- put the seedling mix you prepared up to almost top leaving about 0.5 inches space - now evenly spread the seeds over it after that cover the seeds with seedling mix only about 0.5 cm (half a centimeter)- water it by watering can- place the container in semi-shaded place.

Step 1 :
Fill a pot with water that equals five times the seed volume and brings it to a boil on a stove. Check the temperature of the water with a cooking thermometer, and when it reaches 176 degrees Fahrenheit, remove the pot from the stove.
Step 2:
Place the mimosa pudica seeds in the hot water and stir them for up to two minutes with a spoon before draining the liquid.

Step 3:
Fill a bowl with lukewarm water that's between 86 and 104 degrees Fahrenheit and soak the seeds in it for 24 hours. This pre-treatment is called scarification and alters the hard seed coat, which increases the chances of uniform germination.
Step 4:
Fill a pot with the moist seed-starting mix up to 1 inch from the top, place the seed on top of the surface and cover it with a 1/2-inch layer of the mix. Tamp down lightly and moisten the surface with a water-filled spray bottle to avoid washing away the seed.
step 5:
Cover tightly plastic polythene wrap over the pot to promote soil moisture retention and place it in a dimly lit area of the house. Lift the plastic daily to check that the soil is moist. If not, lightly moisten it with a water-filled spray bottle before replacing the plastic. Expect germination within three to five days.
Step 6:
Remove the plastic as soon as the seedlings emerge, and gradually move the pot to a brighter area over a two-week period so that at the end of that time they're acclimated to being in full sunlight.
Step 7:
Transplant the seedlings outside to an area with full sun and well-draining soil after three to five months, when the seedlings are about 8 to 12 inches tall.

IMPORTANT WATERING USE: Use watering can for watering. By moving the water stream constantly waves the can. Do not let the water to flood in particular area. Or use the sprayer to spray the water like mist.